Hello there! Today I want to show you how to build a puzzle game using Flutter. This will work on both iOS and Android devices. We already build a puzzle game in Android in the past, you can check it here.
If you don’t already have Flutter installed, please start by doing this. You can find how to install it from the Flutter website.
Project Setup
Once you have everything ready, start by creating a new Flutter project, in Android Studio:
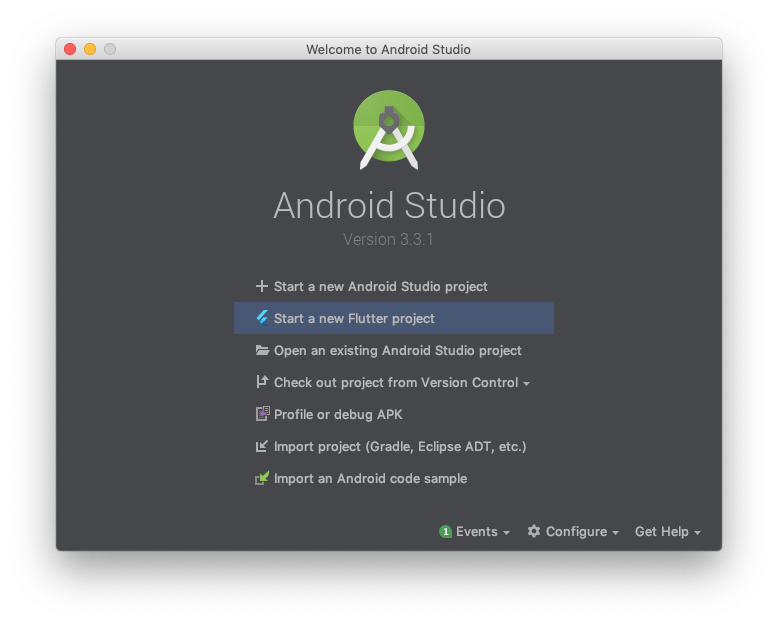
From the next screen, choose to create a Flutter Application, then name the new project flutter_puzzle and use your own company or personal domain for package name generation. I will use dragosholban.com, so the package name will end up being com.dragosholban.flutterpuzzle. It does not matter if we choose to include Kotlin or Swift support, as we will not need to write any native Android or iOS code for this application.
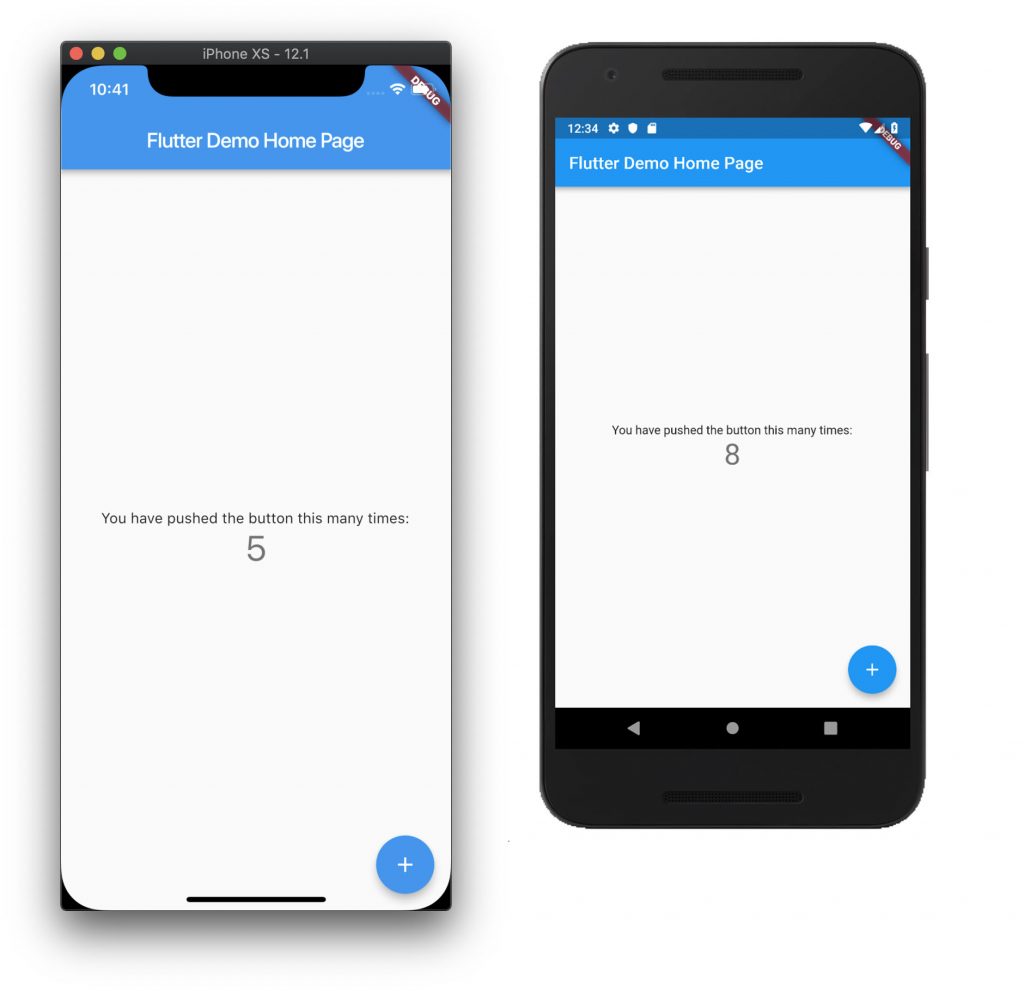
After the new project is generated, run it in a simulator or on a real device, to be sure everything works fine.
To finish our setup, open the lib/main.dart file and replace the content with the following one. We will remove the sample functionality that Flutter generated and replace it with the starting point of our app:
import 'package:flutter/material.dart';

void main() => runApp(MyApp());

class MyApp extends StatelessWidget {
  @override
  Widget build(BuildContext context) {
    return MaterialApp(
      title: 'Flutter Puzzle',
      theme: ThemeData(
        primarySwatch: Colors.blue,
      ),
      home: MyHomePage(title: 'Flutter Puzzle'),
    );
  }
}

class MyHomePage extends StatefulWidget {
  final String title;

  MyHomePage({Key key, this.title}) : super(key: key);

  @override
  _MyHomePageState createState() => _MyHomePageState();
}

class _MyHomePageState extends State<MyHomePage> {

  @override
  Widget build(BuildContext context) {
    return Scaffold(
      appBar: AppBar(
        title: Text(widget.title),
      ),
      body: SafeArea(
        child: new Center(
          child: new Text('No image selected.'),
        ),
      ),
      floatingActionButton: FloatingActionButton(
        onPressed: () => null,
        tooltip: 'New Image',
        child: Icon(Icons.add),
      ),
    );
  }
}
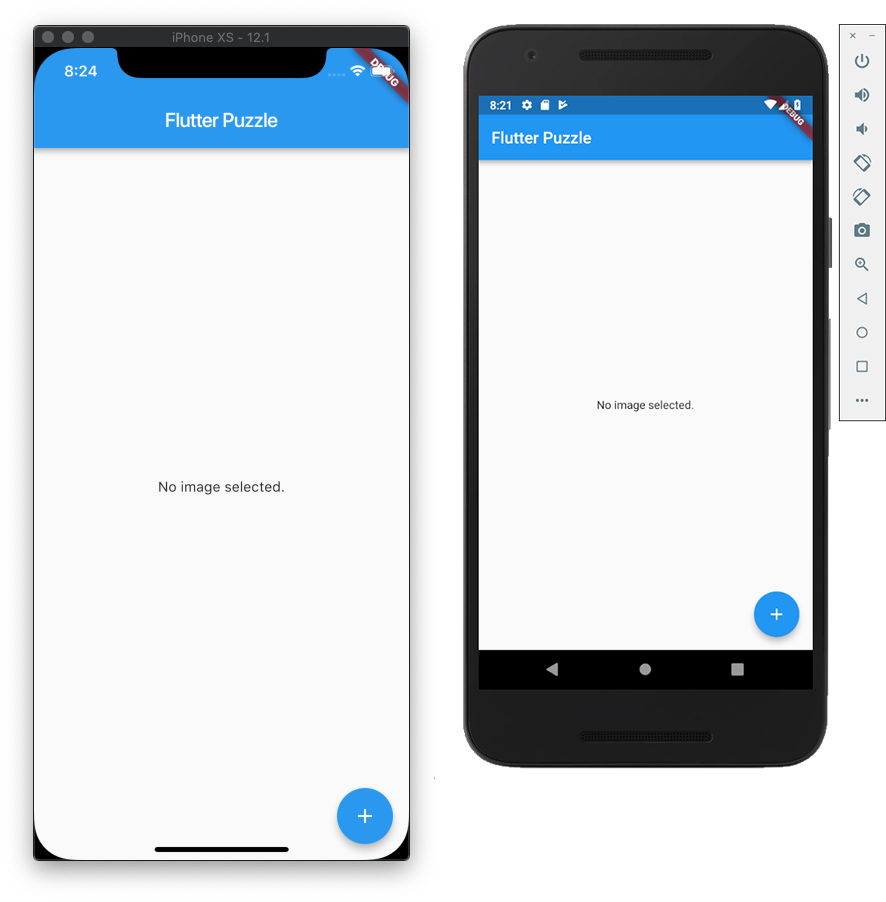
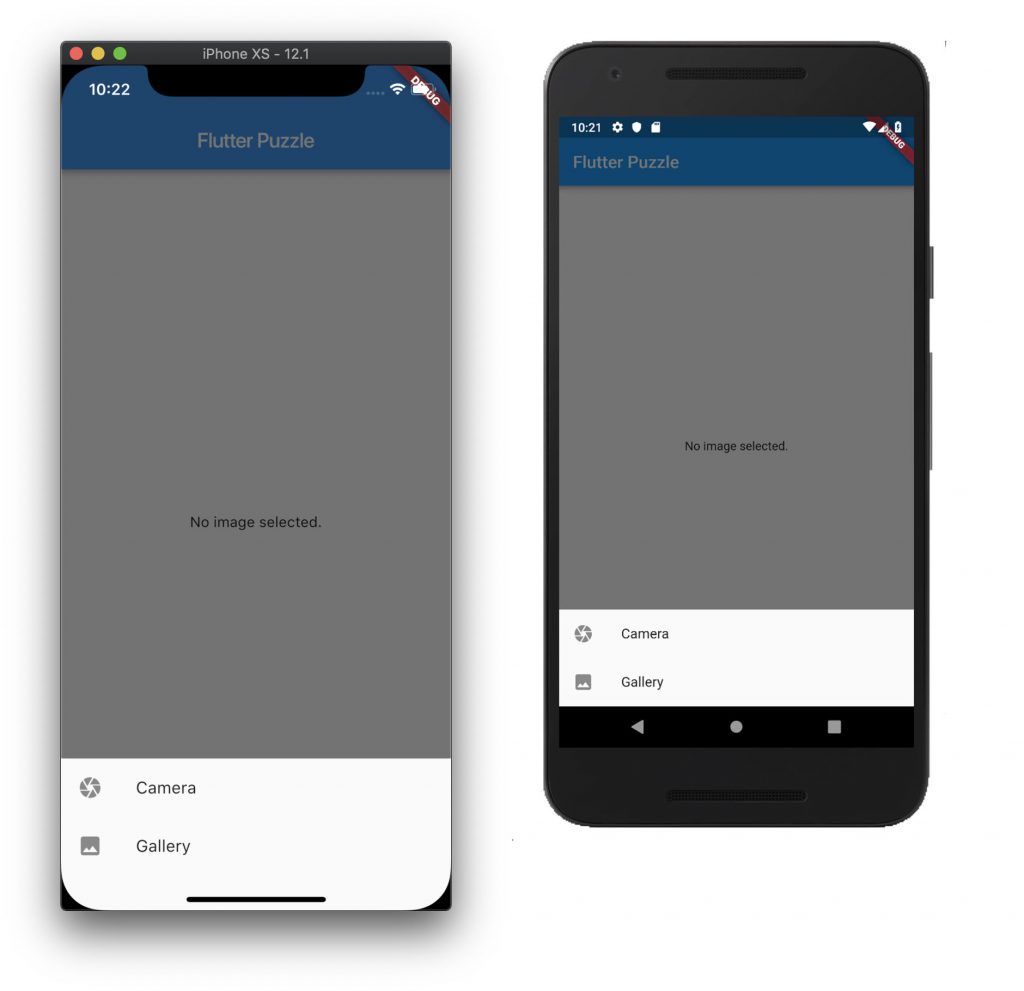
As you can see, this is just an empty screen, with a “No image selected” text in the middle, and a floating button we’ll use later:
Get Image from Camera or Gallery
Now that we have everything in place, let’s start by making our app to be able to load images from the phone’s internal storage or directly capture them using the camera. To do this, we will use a Flutter plugin named image_picker.
Installing new plugins in Flutter is as simple as adding them to the pubspec.yaml file, then running flutter get from the console or directly from Android Studio.
...
dependencies:
  flutter:
    sdk: flutter

  # The following adds the Cupertino Icons font to your application.
  # Use with the CupertinoIcons class for iOS style icons.
  cupertino_icons: ^0.1.2

  image_picker: ^0.4.10
...
As we already added a floating button for the users to select a new image, let’s just make the necessary changes so it does just this. First, we’ll present the user with the option of choosing the image source: Camera or Gallery. Make the following change to the main.dart file:
// ...

class _MyHomePageState extends State<MyHomePage> {
 @override
   Widget build(BuildContext context) {
     return Scaffold(
       appBar: AppBar(
         title: Text(widget.title),
       ),
       body: SafeArea(
         child: new Center(
           child: new Text('No image selected.'),
         ),
       ),
       floatingActionButton: FloatingActionButton(
         onPressed: () {
           showModalBottomSheet(context: context,
               builder: (BuildContext context) {
                 return SafeArea(
                   child: new Column(
                     mainAxisSize: MainAxisSize.min,
                     children: [
                       new ListTile(
                         leading: new Icon(Icons.camera),
                         title: new Text('Camera'),
                         onTap: () => null,
                       ),
                       new ListTile(
                         leading: new Icon(Icons.image),
                         title: new Text('Gallery'),
                         onTap: () => null,
                       ),
                     ],
                   ),
                 );
               }
           );
         },
         tooltip: 'New Image',
         child: Icon(Icons.add),
       ),
     );
   }
 }
Now, when you tap on the floating button, a bottom menu will show up asking for the desired source of image. Make sure everything runs smoothly:
To actually get the images, we will create a new method to be called when the user selects either Camera or Gallery from the above. We’ll show the image to the user when it’s loaded by changing the state of our app. Also, please note that we had to import some dart libraries and the image_picker Flutter plugin we installed earlier:
import 'dart:async';
import 'dart:io';

import 'package:flutter/material.dart';
import 'package:image_picker/image_picker.dart';

void main() => runApp(MyApp());

// ...

class _MyHomePageState extends State<MyHomePage> {
  File _image;

  Future getImage(ImageSource source) async {
    var image = await ImagePicker.pickImage(source: source);

    if (image != null) {
      setState(() {
        _image = image;
      });
    }
  }

  @override
  Widget build(BuildContext context) {
    return Scaffold(
      appBar: AppBar(
        title: Text(widget.title),
      ),
      body: SafeArea(
        child: new Center(
          child: _image == null
            ? new Text('No image selected.')
            : Image.file(_image)
        ),
      ),
      floatingActionButton: FloatingActionButton(
        onPressed: () {
          showModalBottomSheet<void>(context: context,
              builder: (BuildContext context) {
                return SafeArea(
                  child: new Column(
                    mainAxisSize: MainAxisSize.min,
                    children: <Widget>[
                      new ListTile(
                        leading: new Icon(Icons.camera),
                        title: new Text('Camera'),
                        onTap: () {
                          getImage(ImageSource.camera);
                          // this is how you dismiss the modal bottom sheet after making a choice
                          Navigator.pop(context);
                        },
                      ),
                      new ListTile(
                        leading: new Icon(Icons.image),
                        title: new Text('Gallery'),
                        onTap: () {
                          getImage(ImageSource.gallery);
                          // dismiss the modal sheet
                          Navigator.pop(context);
                        },
                      ),
                    ],
                  ),
                );
              }
          );
        },
        tooltip: 'New Image',
        child: Icon(Icons.add),
      ),
    );
  }
}
The last thing we need to do for this to work, is to add some iOS specific permissions details. Open the ios/Runner/Info.plist file and add two more lines in it like shown below:
<?xml version="1.0" encoding="UTF-8"?>
<!DOCTYPE plist PUBLIC "-//Apple//DTD PLIST 1.0//EN" "http://www.apple.com/DTDs/PropertyList-1.0.dtd">
<plist version="1.0">
<dict>
    <key>CFBundleDevelopmentRegion</key>
    <string>en</string>
    ...
    <key>NSPhotoLibraryUsageDescription</key>
    <string>The app needs to access the Photo Library in order to be able to load images from it.</string>
    <key>NSCameraUsageDescription</key>
    <string>The app needs to access the Camera in order to be able to get images from it.</string>
</dict>
</plist>
You can now test the app, you should be able to load images or capture new ones on both platforms. When you’re done checking, go to the next section.

Split Image into Puzzle Pieces
For the pieces of our puzzle, we will create a new flutter widget, the PuzzlePiece. Create a new PuzzlePiece.dart file in the lib folder.
This widget will take an image and clip it to a path that defines our puzzle piece. It also needs to know the row and the column for the piece it is drawing and the maximum number of rows/columns for the entire puzzle (maxRow and maxCol).
import 'dart:math';

import 'package:flutter/material.dart';

class PuzzlePiece extends StatefulWidget {
  final Image image;
  final Size imageSize;
  final int row;
  final int col;
  final int maxRow;
  final int maxCol;

  PuzzlePiece(
      {Key key,
        @required this.image,
        @required this.imageSize,
        @required this.row,
        @required this.col,
        @required this.maxRow,
        @required this.maxCol})
      : super(key: key);

  @override
  PuzzlePieceState createState() {
    return new PuzzlePieceState();
  }
}

class PuzzlePieceState extends State<PuzzlePiece> {
  double top;
  double left;

  @override
  Widget build(BuildContext context) {
    final imageWidth = MediaQuery.of(context).size.width;
    final imageHeight = MediaQuery.of(context).size.height * MediaQuery.of(context).size.width / widget.imageSize.width;
    final pieceWidth = imageWidth / widget.maxCol;
    final pieceHeight = imageHeight / widget.maxRow;

    if (top == null) {
      top = Random().nextInt((imageHeight - pieceHeight).ceil()).toDouble();
      top -= widget.row * pieceHeight;
    }
    if (left == null) {
      left = Random().nextInt((imageWidth - pieceWidth).ceil()).toDouble();
      left -= widget.col * pieceWidth;
    }

    return Positioned(
        top: top,
        left: left,
        width: imageWidth,
        child: ClipPath(
          child: CustomPaint(
            foregroundPainter: PuzzlePiecePainter(widget.row, widget.col, widget.maxRow, widget.maxCol),
            child: widget.image
          ),
        clipper: PuzzlePieceClipper(widget.row, widget.col, widget.maxRow, widget.maxCol),
      ),
    );
  }
}

// this class is used to clip the image to the puzzle piece path
class PuzzlePieceClipper extends CustomClipper<Path> {
  final int row;
  final int col;
  final int maxRow;
  final int maxCol;

  PuzzlePieceClipper(this.row, this.col, this.maxRow, this.maxCol);

  @override
  Path getClip(Size size) {
    return getPiecePath(size, row, col, maxRow, maxCol);
  }

  @override
  bool shouldReclip(CustomClipper<Path> oldClipper) => false;
}

// this class is used to draw a border around the clipped image
class PuzzlePiecePainter extends CustomPainter {
  final int row;
  final int col;
  final int maxRow;
  final int maxCol;

  PuzzlePiecePainter(this.row, this.col, this.maxRow, this.maxCol);

  @override
  void paint(Canvas canvas, Size size) {
    final Paint paint = Paint()
      ..color = Color(0x80FFFFFF)
      ..style = PaintingStyle.stroke
      ..strokeWidth = 1.0;

    canvas.drawPath(getPiecePath(size, row, col, maxRow, maxCol), paint);
  }

  @override
  bool shouldRepaint(CustomPainter oldDelegate) {
    return false;
  }
}

// this is the path used to clip the image and, then, to draw a border around it; here we actually draw the puzzle piece
Path getPiecePath(Size size, int row, int col, int maxRow, int maxCol) {
  final width = size.width / maxCol;
  final height = size.height / maxRow;
  final offsetX = col * width;
  final offsetY = row * height;
  final bumpSize = height / 4;

  var path = Path();
  path.moveTo(offsetX, offsetY);

  if (row == 0) {
    // top side piece
    path.lineTo(offsetX + width, offsetY);
  } else {
    // top bump
    path.lineTo(offsetX + width / 3, offsetY);
    path.cubicTo(offsetX + width / 6, offsetY - bumpSize, offsetX + width / 6 * 5, offsetY - bumpSize, offsetX + width / 3 * 2, offsetY);
    path.lineTo(offsetX + width, offsetY);
  }

  if (col == maxCol - 1) {
    // right side piece
    path.lineTo(offsetX + width, offsetY + height);
  } else {
    // right bump
    path.lineTo(offsetX + width, offsetY + height / 3);
    path.cubicTo(offsetX + width - bumpSize, offsetY + height / 6, offsetX + width - bumpSize, offsetY + height / 6 * 5, offsetX + width, offsetY + height / 3 * 2);
    path.lineTo(offsetX + width, offsetY + height);
  }

  if (row == maxRow - 1) {
    // bottom side piece
    path.lineTo(offsetX, offsetY + height);
  } else {
    // bottom bump
    path.lineTo(offsetX + width / 3 * 2, offsetY + height);
    path.cubicTo(offsetX + width / 6 * 5, offsetY + height - bumpSize, offsetX + width / 6, offsetY + height - bumpSize, offsetX + width / 3, offsetY + height);
    path.lineTo(offsetX, offsetY + height);
  }

  if (col == 0) {
    // left side piece
    path.close();
  } else {
    // left bump
    path.lineTo(offsetX, offsetY + height / 3 * 2);
    path.cubicTo(offsetX - bumpSize, offsetY + height / 6 * 5, offsetX - bumpSize, offsetY + height / 6, offsetX, offsetY + height / 3);
    path.close();
  }

  return path;
}
Back in the main.dart file, add the following to start using this new widget:
import 'dart:async';
import 'dart:io';

import 'package:flutter/material.dart';
import 'package:image_picker/image_picker.dart';

import 'package:flutter_puzzle/PuzzlePiece.dart';

void main() => runApp(MyApp());

class MyApp extends StatelessWidget {
  @override
  Widget build(BuildContext context) {
    return MaterialApp(
      title: 'Flutter Puzzle',
      theme: ThemeData(
        primarySwatch: Colors.blue,
      ),
      home: MyHomePage(title: 'Flutter Puzzle'),
    );
  }
}

class MyHomePage extends StatefulWidget {
  final String title;
  final int rows = 3;
  final int cols = 3;

  MyHomePage({Key key, this.title}) : super(key: key);

  @override
  _MyHomePageState createState() => _MyHomePageState();
}

class _MyHomePageState extends State<MyHomePage> {
  File _image;
  List<Widget> pieces = [];

  Future getImage(ImageSource source) async {
    var image = await ImagePicker.pickImage(source: source);

    if (image != null) {
      setState(() {
        _image = image;
        pieces.clear();
      });

      splitImage(Image.file(image));
    }
  }

  // we need to find out the image size, to be used in the PuzzlePiece widget
  Future<Size> getImageSize(Image image) async {
    final Completer<Size> completer = Completer<Size>();

    image.image.resolve(const ImageConfiguration()).addListener(
          (ImageInfo info, bool _) {
        completer.complete(Size(
          info.image.width.toDouble(),
          info.image.height.toDouble(),
        ));
      },
    );

    final Size imageSize = await completer.future;

    return imageSize;
  }

  // here we will split the image into small pieces using the rows and columns defined above; each piece will be added to a stack
  void splitImage(Image image) async {
    Size imageSize = await getImageSize(image);

    for (int x = 0; x < widget.rows; x++) {
      for (int y = 0; y < widget.cols; y++) {
        setState(() {
          pieces.add(PuzzlePiece(key: GlobalKey(),
              image: image,
              imageSize: imageSize,
              row: x,
              col: y,
              maxRow: widget.rows,
              maxCol: widget.cols));
        });
      }
    }
  }

  @override
  Widget build(BuildContext context) {
    return Scaffold(
      appBar: AppBar(
        title: Text(widget.title),
      ),
      body: SafeArea(
        child: new Center(
          child: _image == null
            ? new Text('No image selected.')
            : Stack(children: pieces)
        ),
      ),
      floatingActionButton: FloatingActionButton(
        onPressed: () {
          showModalBottomSheet<void>(context: context,
              builder: (BuildContext context) {
                return SafeArea(
                  child: new Column(
                    mainAxisSize: MainAxisSize.min,
                    children: <Widget>[
                      new ListTile(
                        leading: new Icon(Icons.camera),
                        title: new Text('Camera'),
                        onTap: () {
                          getImage(ImageSource.camera);
                          Navigator.pop(context);
                        },
                      ),
                      new ListTile(
                        leading: new Icon(Icons.image),
                        title: new Text('Gallery'),
                        onTap: () {
                          getImage(ImageSource.gallery);
                          Navigator.pop(context);
                        },
                      ),
                    ],
                  ),
                );
              }
          );
        },
        tooltip: 'New Image',
        child: Icon(Icons.add),
      ),
    );
  }
}
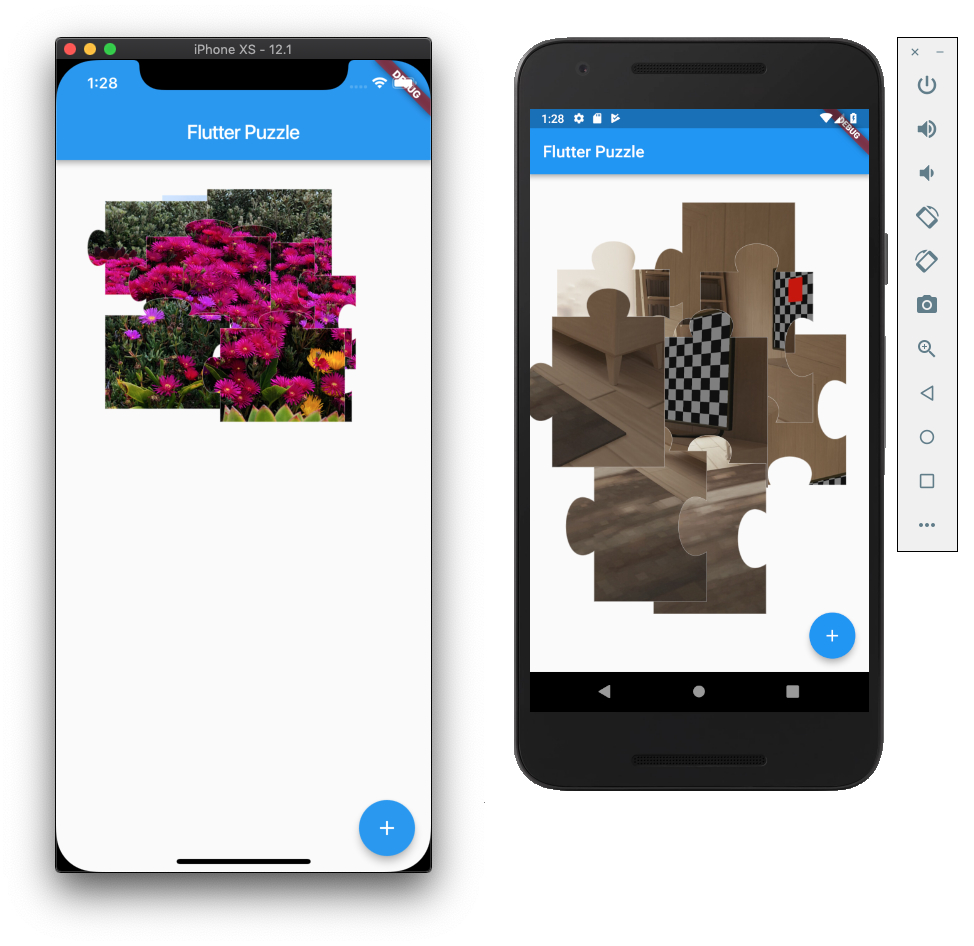
If you run the app now and load an image, you will see it transformed into multiple puzzle pieces, random positioned on the screen.
Move the Puzzle Pieces Around and Snap into Place
Next, we will add a Flutter GestureDetector to allow the user to move (to pan) the pieces around the screen. When a piece is close to its final position, we will snap it into place and disable the movement. Add the highlighted code to the PuzzlePiece widget to do this:
class PuzzlePiece extends StatefulWidget {
  final Image image;
  final Size imageSize;
  final int row;
  final int col;
  final int maxRow;
  final int maxCol;
  final Function bringToTop;
  final Function sendToBack;

  PuzzlePiece(
      {Key key,
        @required this.image,
        @required this.imageSize,
        @required this.row,
        @required this.col,
        @required this.maxRow,
        @required this.maxCol,
        @required this.bringToTop,
        @required this.sendToBack})
      : super(key: key);

  @override
  PuzzlePieceState createState() {
    return new PuzzlePieceState();
  }
}

class PuzzlePieceState extends State<PuzzlePiece> {
  double top;
  double left;
  bool isMovable = true;

  @override
  Widget build(BuildContext context) {
    final imageWidth = MediaQuery.of(context).size.width;
    final imageHeight = MediaQuery.of(context).size.height * MediaQuery.of(context).size.width / widget.imageSize.width;
    final pieceWidth = imageWidth / widget.maxCol;
    final pieceHeight = imageHeight / widget.maxRow;

    if (top == null) {
      top = Random().nextInt((imageHeight - pieceHeight).ceil()).toDouble();
      top -= widget.row * pieceHeight;
    }
    if (left == null) {
      left = Random().nextInt((imageWidth - pieceWidth).ceil()).toDouble();
      left -= widget.col * pieceWidth;
    }

    return Positioned(
        top: top,
        left: left,
        width: imageWidth,
        child: GestureDetector(
          onTap: () {
            if (isMovable) {
              widget.bringToTop(widget);
            }
          },
          onPanStart: (_) {
            if (isMovable) {
              widget.bringToTop(widget);
            }
          },
          onPanUpdate: (dragUpdateDetails) {
            if (isMovable) {
              setState(() {
                top += dragUpdateDetails.delta.dy;
                left += dragUpdateDetails.delta.dx;

                if(-10 < top && top < 10 && -10 < left && left < 10) {
                  top = 0;
                  left = 0;
                  isMovable = false;
                  widget.sendToBack(widget);
                }
              });
            }
          },
          child: ClipPath(
            child: widget.image,
            clipper: PuzzlePieceClipper(widget.row, widget.col, widget.maxRow, widget.maxCol),
          ),
        ),
    );
  }
}
Finally, add the following to the main.dart file:
void splitImage(Image image) async {
  Size imageSize = await getImageSize(image);

  for (int x = 0; x < widget.rows; x++) {
    for (int y = 0; y < widget.cols; y++) {
      setState(() {
        pieces.add(PuzzlePiece(key: GlobalKey(),
            image: image,
            imageSize: imageSize,
            row: x,
            col: y,
            maxRow: widget.rows,
            maxCol: widget.cols,
            bringToTop: this.bringToTop,
            sendToBack: this.sendToBack));
      });
    }
  }
}

// when the pan of a piece starts, we need to bring it to the front of the stack
void bringToTop(Widget widget) {
  setState(() {
    pieces.remove(widget);
    pieces.add(widget);
  });
}

// when a piece reaches its final position, it will be sent to the back of the stack to not get in the way of other, still movable, pieces
void sendToBack(Widget widget) {
  setState(() {
    pieces.remove(widget);
    pieces.insert(0, widget);
  });
}
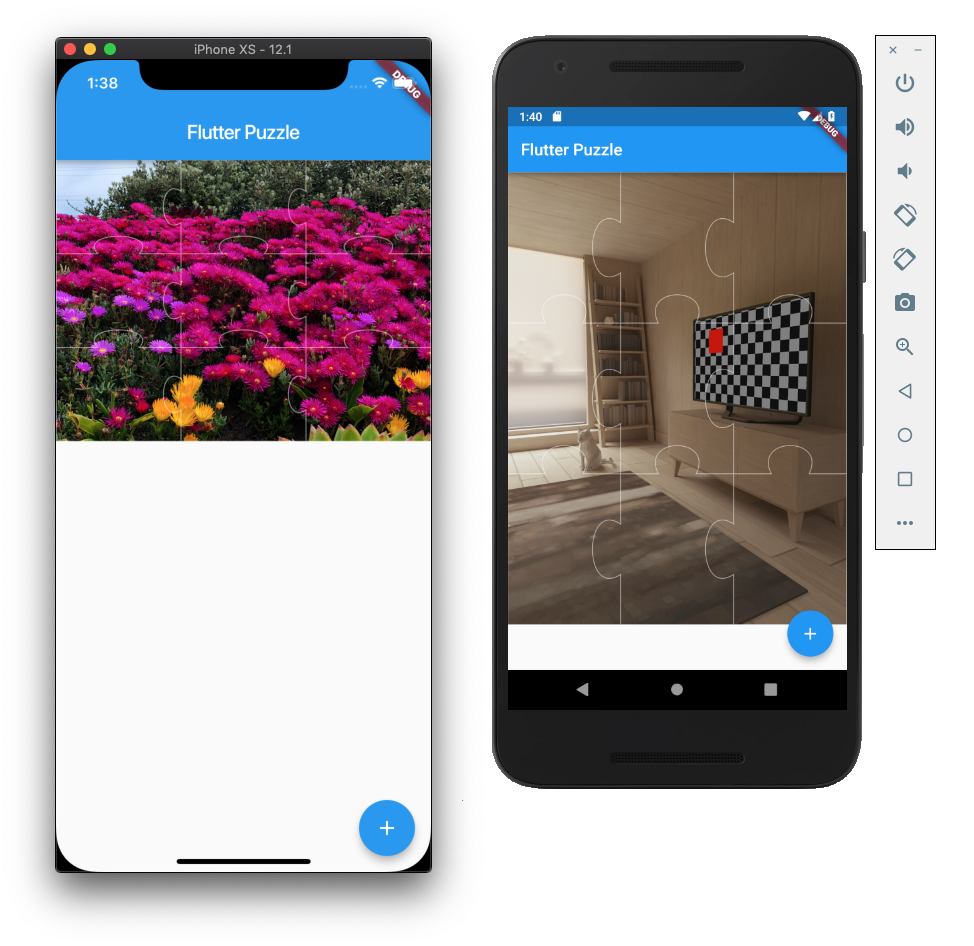
Run the app again, select an image and try to complete the puzzle! Everything should work fine and you can congratulate yourself for making such an awesome app…
But there is more you can do on your own to improve this game! One obvious thing, is to check when all the pieces are in place and restart the game. Other, is to restrict the app in portrait mode. But I’ll let you discover by yourself how to do this. (Tip: you’ll have to configure each native app, iOS and Android, separately, for the latter).
I hope you enjoyed this tutorial about building a puzzle game in Flutter. Please let me know in the comments how it worked out for you and, if you have, any issues or suggestions I could use to improve it. You can get the final code from GitHub and use it as you please. Thanks!
Thank you for publishing this. I’m working on an app that involves a puzzle, and you’ve saved me many hours of work!
I did receive the following error when compiling the app:
“Target of URI doesn’t exist: ‘package:flutter_puzzle/PuzzlePiece.dart'”
I’ve double checked and don’t think I missed anything. I added “import ‘package:flutter_puzzle/PuzzlePiece.dart’;” to main.dart. Any help would be appreciated.
replace import ‘package:flutter_puzzle/PuzzlePiece.dart’” with import ‘PuzzlePiece.dart’;
Adding “flutter_puzzle:lib/” to the .packages file seems to have resolved the issue.
So actually changing the import to “import ‘package:picture_puzzle/PuzzlePiece.dart’;” resolved the issue.
You probably named you project “picture_puzzle”. I named mine “flutter_puzzle”.
Thanks again for creating and publishing this great app in dart. You are correct about the name of my app. I’m new to dart and OOP, so didn’t understand the ramifications of using a different name.
While playing around with the app, I flipped a puzzle piece off of the screen and was not able to retrieve it. Would it be difficult to prevent this from happening?
Could you explain briefly how to “feed” an image to the puzzle maker (e.g., from assets or a website) instead of picking one from the camera or gallery? Thanks in advance,
Never mind! I figured something out. It’s not elegant, but it works!
Hi! If you want, could you, please, share what you did? Thanks!
I basically replaced the ImagePicker with an ImageGetter (see below). Inside the ImageGetter I returned a path that was of the expected type. For the sake of testing and development I hardcoded the paths for now. I’ve been a business programmer for 35 years, but I’m brand new to OOP, Flutter and Dart, so I’m sure there’s a better way! Also, I found a way to determine if a puzzle is complete, but I can’t figure out how to navigate to restart the game. Any suggestions?
class ImageGetter {
static const MethodChannel _channel =
MethodChannel(‘plugins.flutter.io/image_picker’);
static Future pickImage({
@required ImageSource source,
double maxWidth,
double maxHeight,
}) async {
assert(source != null);
print(‘image_getter puzzle is $puzzle’);
if ((puzzle – 1) == 1) {
pathin = ‘/storage/emulated/0/Download/GrandCanyon.jpg’;
} else if ((puzzle – 1) == 2) {
pathin =
‘/storage/emulated/0/Download/Yosemite.jpg’;
}
Because I made this as a single screen app, there is nowhere to navigate. A real app will probably have multiple screens and you could just use Navigator.pop(context); to go back. Here I think you could set the _image from the _MyHomePageState to null to make the completed puzzle go away.
At this line:
“`
image.image.resolve(const ImageConfiguration()).addListener(
(ImageInfo info, bool _) {
“`
I keep getting the error message
“`
Error: The argument type ‘Null Function(ImageInfo, bool)’ can’t be assigned to the parameter type ‘ImageStreamListener’.
“`
Any idea what my error could be?
replace with this
image.image.resolve(const ImageConfiguration()).addListener(ImageStreamListener(
(ImageInfo info, bool _) {
completer.complete(Size(
info.image.width.toDouble(),
info.image.height.toDouble(),
));
},
));
as the image picker has made a breaking change in api
refer flutter package documentation
I think I already wrote you, but my post was not published, so I try again: The app currently throws an error:
“`
The argument type ‘Null Function(ImageInfo, bool)’ can’t be assigned to the parameter type ‘ImageStreamListener’.
“`
Would it be possible to motivate you to provide a solution (maybe even with a with a description)?
Thank you!
Add “ImageStreamListener”
https://stackoverflow.com/questions/56957461/error-the-argument-type-void-functionimageinfo-bool-cant-be-assigned-to-t
Why do you not respond?
here is the answer:
Future getImageSize(Image image) async {
final Completer completer = Completer();
image.image.resolve(const ImageConfiguration()).addListener(
(ImageStreamListener(
(ImageInfo info, bool _) {
completer.complete(Size(
info.image.width.toDouble(),
info.image.height.toDouble(),
));
},
)),
);
final Size imageSize = await completer.future;
return imageSize;
}
https://stackoverflow.com/questions/56957461/error-the-argument-type-void-functionimageinfo-bool-cant-be-assigned-to-t
RW there was a breaking change in Flutter image. Wrap the content of the addlistener in a ImageStreamListener…
image.image
.resolve(const ImageConfiguration())
.addListener(ImageStreamListener(
(ImageInfo info, bool _) {
completer.complete(Size(
info.image.width.toDouble(),
info.image.height.toDouble(),
));
},
));
With new flutter, this is the solution:
Future getImageSize() {
Completer completer = Completer();
Image image = Image.network(“https://i.stack.imgur.com/lkd0a.png”);
image.image.resolve(ImageConfiguration()).addListener(
ImageStreamListener(
(ImageInfo image, bool synchronousCall) {
var myImage = image.image;
Size size = Size(myImage.width.toDouble(), myImage.height.toDouble());
completer.complete(size);
},
),
);
return completer.future;
}
(ImageInfo info, bool _) {
completer.complete(Size(
info.image.width.toDouble(),
info.image.height.toDouble(),
));
},
to
new ImageStreamListener((ImageInfo info, bool _) {
completer.complete(Size(
info.image.width.toDouble(),
info.image.height.toDouble(),
));
}),
Does this example work?
Nice tutorial, I’m newbie in flutter language, found it in Medium :).
Thanks for sharing!
This link may be helpful. @Robert Wildling
https://stackoverflow.com/a/56957797/288724
// New API
image.image
.resolve(new ImageConfiguration())
.addListener(ImageStreamListener((ImageInfo info, bool _) {
completer.complete(info);
}));
Hi everyone, how can I organize a cropped photo into a list below?
* check when all the pieces are in place and restart the game. I have achieved this using the iterator
create the property iterate in _MyHomePageState class
int iterate = 0;
and increment each time the peice fixed to its position ( elements of pieces move one place every time sendToBack is called so. 4 column & 4 rows . total 8 times sendToBack widget called to move element position in peices).
void sendToBack(Widget widget) {
setState(() {
pieces.remove(widget);
pieces.insert(0, widget);
iterate++;
});
if (iterate == pieces.length) {
print(“done”);
pieces.clear();
splitImage(Image image);
}
}
I am using this puzzle code in my mobile app project. Any license issues ?
I have been trying everything to make this work on landscape but am unable to. The pieces look weird that way. I would appreciate any help.
Thank you
Really helpfull blog.
But how to know if the user has finished the puzzle or mark him succeeded..?
Any possibility to put all the pieces in one container other than the center board…something like bucket and drag one by one to place..
how to place all the pieces at one single point to pick…
Something like placing bucket area where all the pieces are placed and pick the piece one by one to place in its position…