A lot of people use Instagram and you probably think it’s something very hard to build by your own. In the next tutorial I will show you that it actually can be quite easy. We will build an Instagram-like app (not the fully featured Instagram, but a solid starting point) using Google’s Firebase to keep our data.
Project Setup
As always, we will start from scratch, by creating a new Android Studio project. Let’s name it My Instagram App (inspiring, I know) and set the minimum SDK version to API 16. We will use an Empty Activity for starters, with the default MainActivity name for the Java class and activity_main for the layout.
Let’s also restrict the activity’s orientation to portrait in the AndroidManifest:
<?xml version="1.0" encoding="utf-8"?>
<manifest xmlns:android="http://schemas.android.com/apk/res/android"
    package="com.dragosholban.myinstagramapp">

    <application
        android:allowBackup="true"
        android:icon="@mipmap/ic_launcher"
        android:label="@string/app_name"
        android:roundIcon="@mipmap/ic_launcher_round"
        android:supportsRtl="true"
        android:theme="@style/AppTheme">
        <activity android:name=".MainActivity"
            android:screenOrientation="portrait">
            <intent-filter>
                <action android:name="android.intent.action.MAIN" />

                <category android:name="android.intent.category.LAUNCHER" />
            </intent-filter>
        </activity>
    </application>

</manifest>
Adding Firebase to Our Android Project
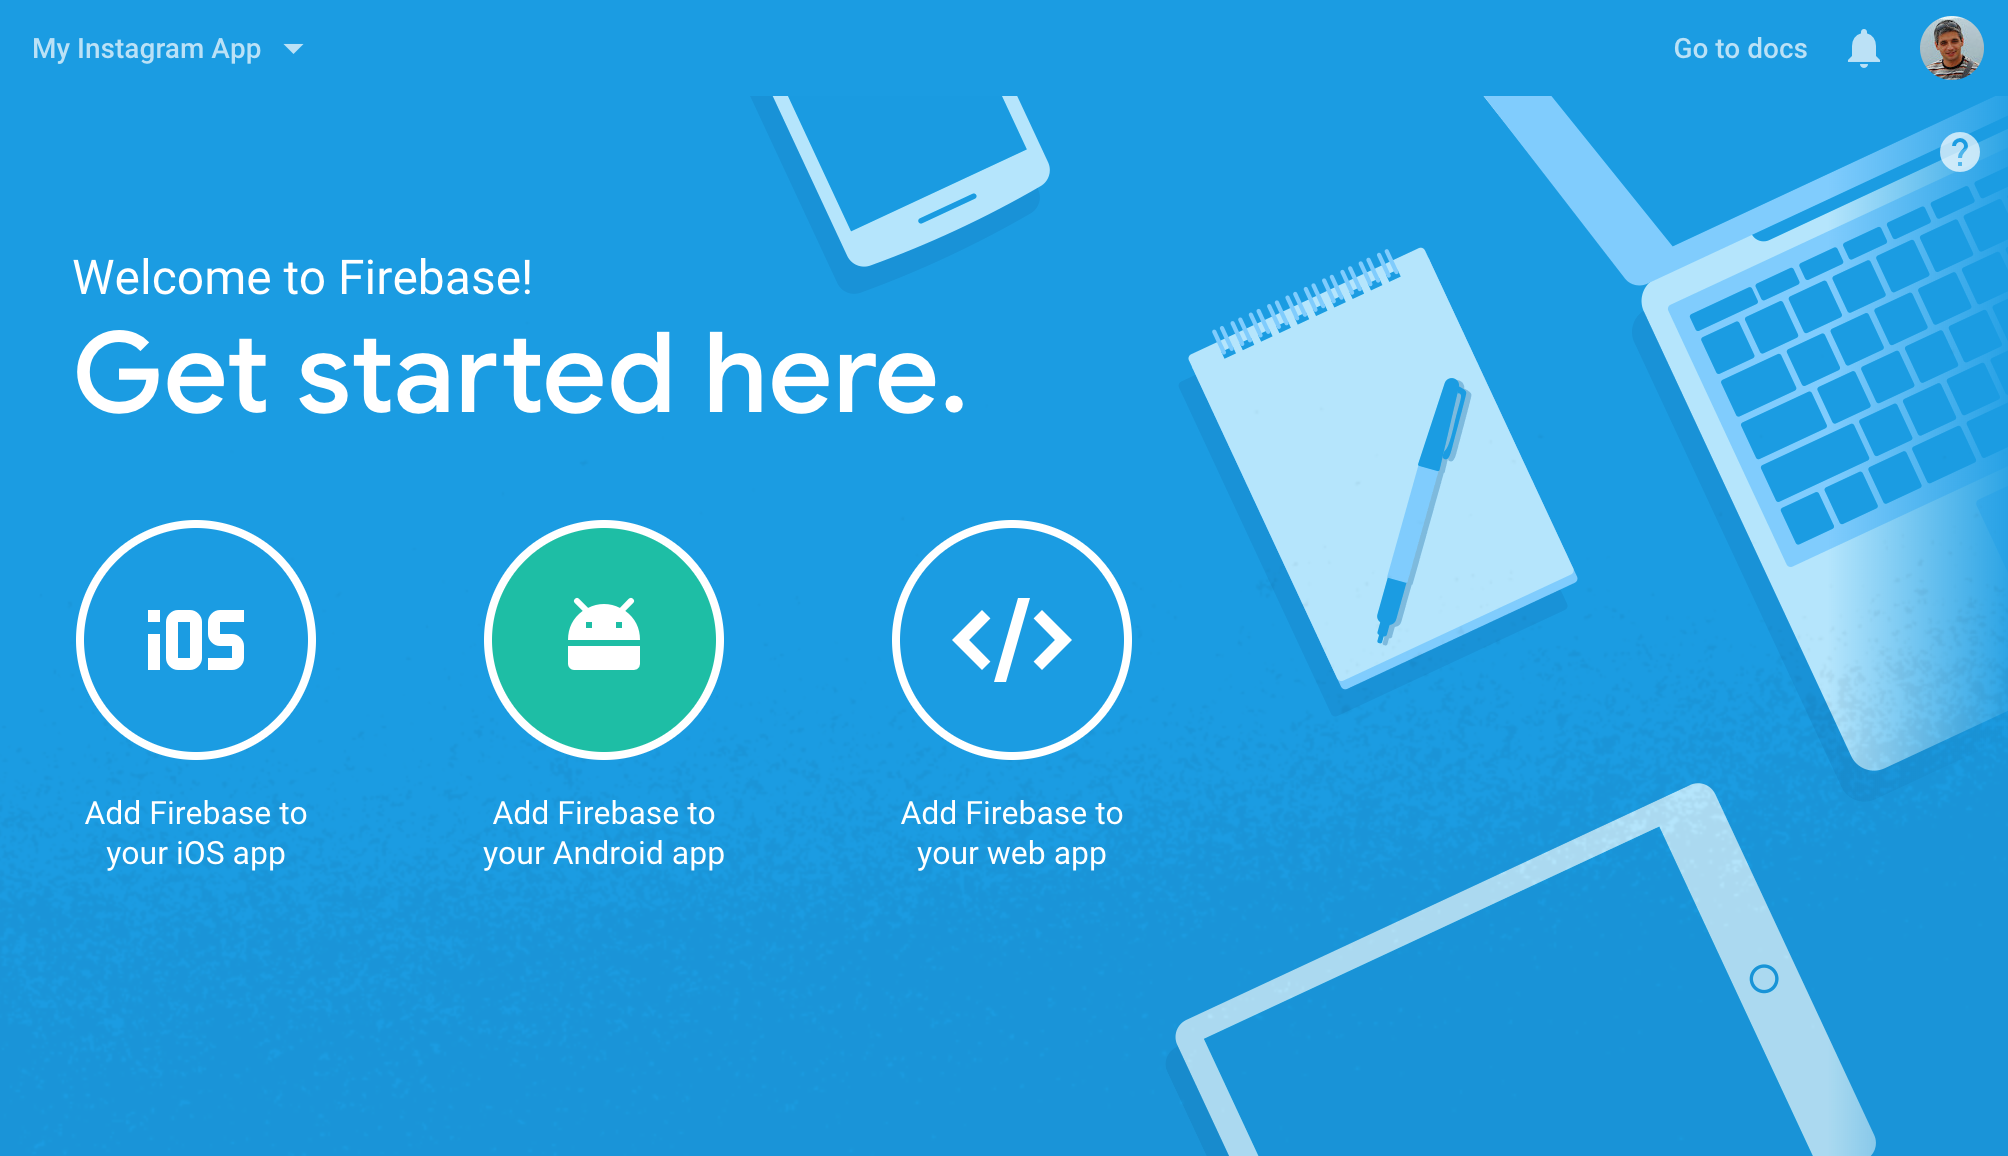
To use all the goodies Google has to ofer in the Firebase platform we need to add it to our project. First, go to the Firebase Console and create a new project. I’ll name mine My Instagram App, like before.
Next, select Add Firebase to your Android app and follow the wizard. When you’re done, proceed to the next section.
Using Firebase Auth to Authenticate Users
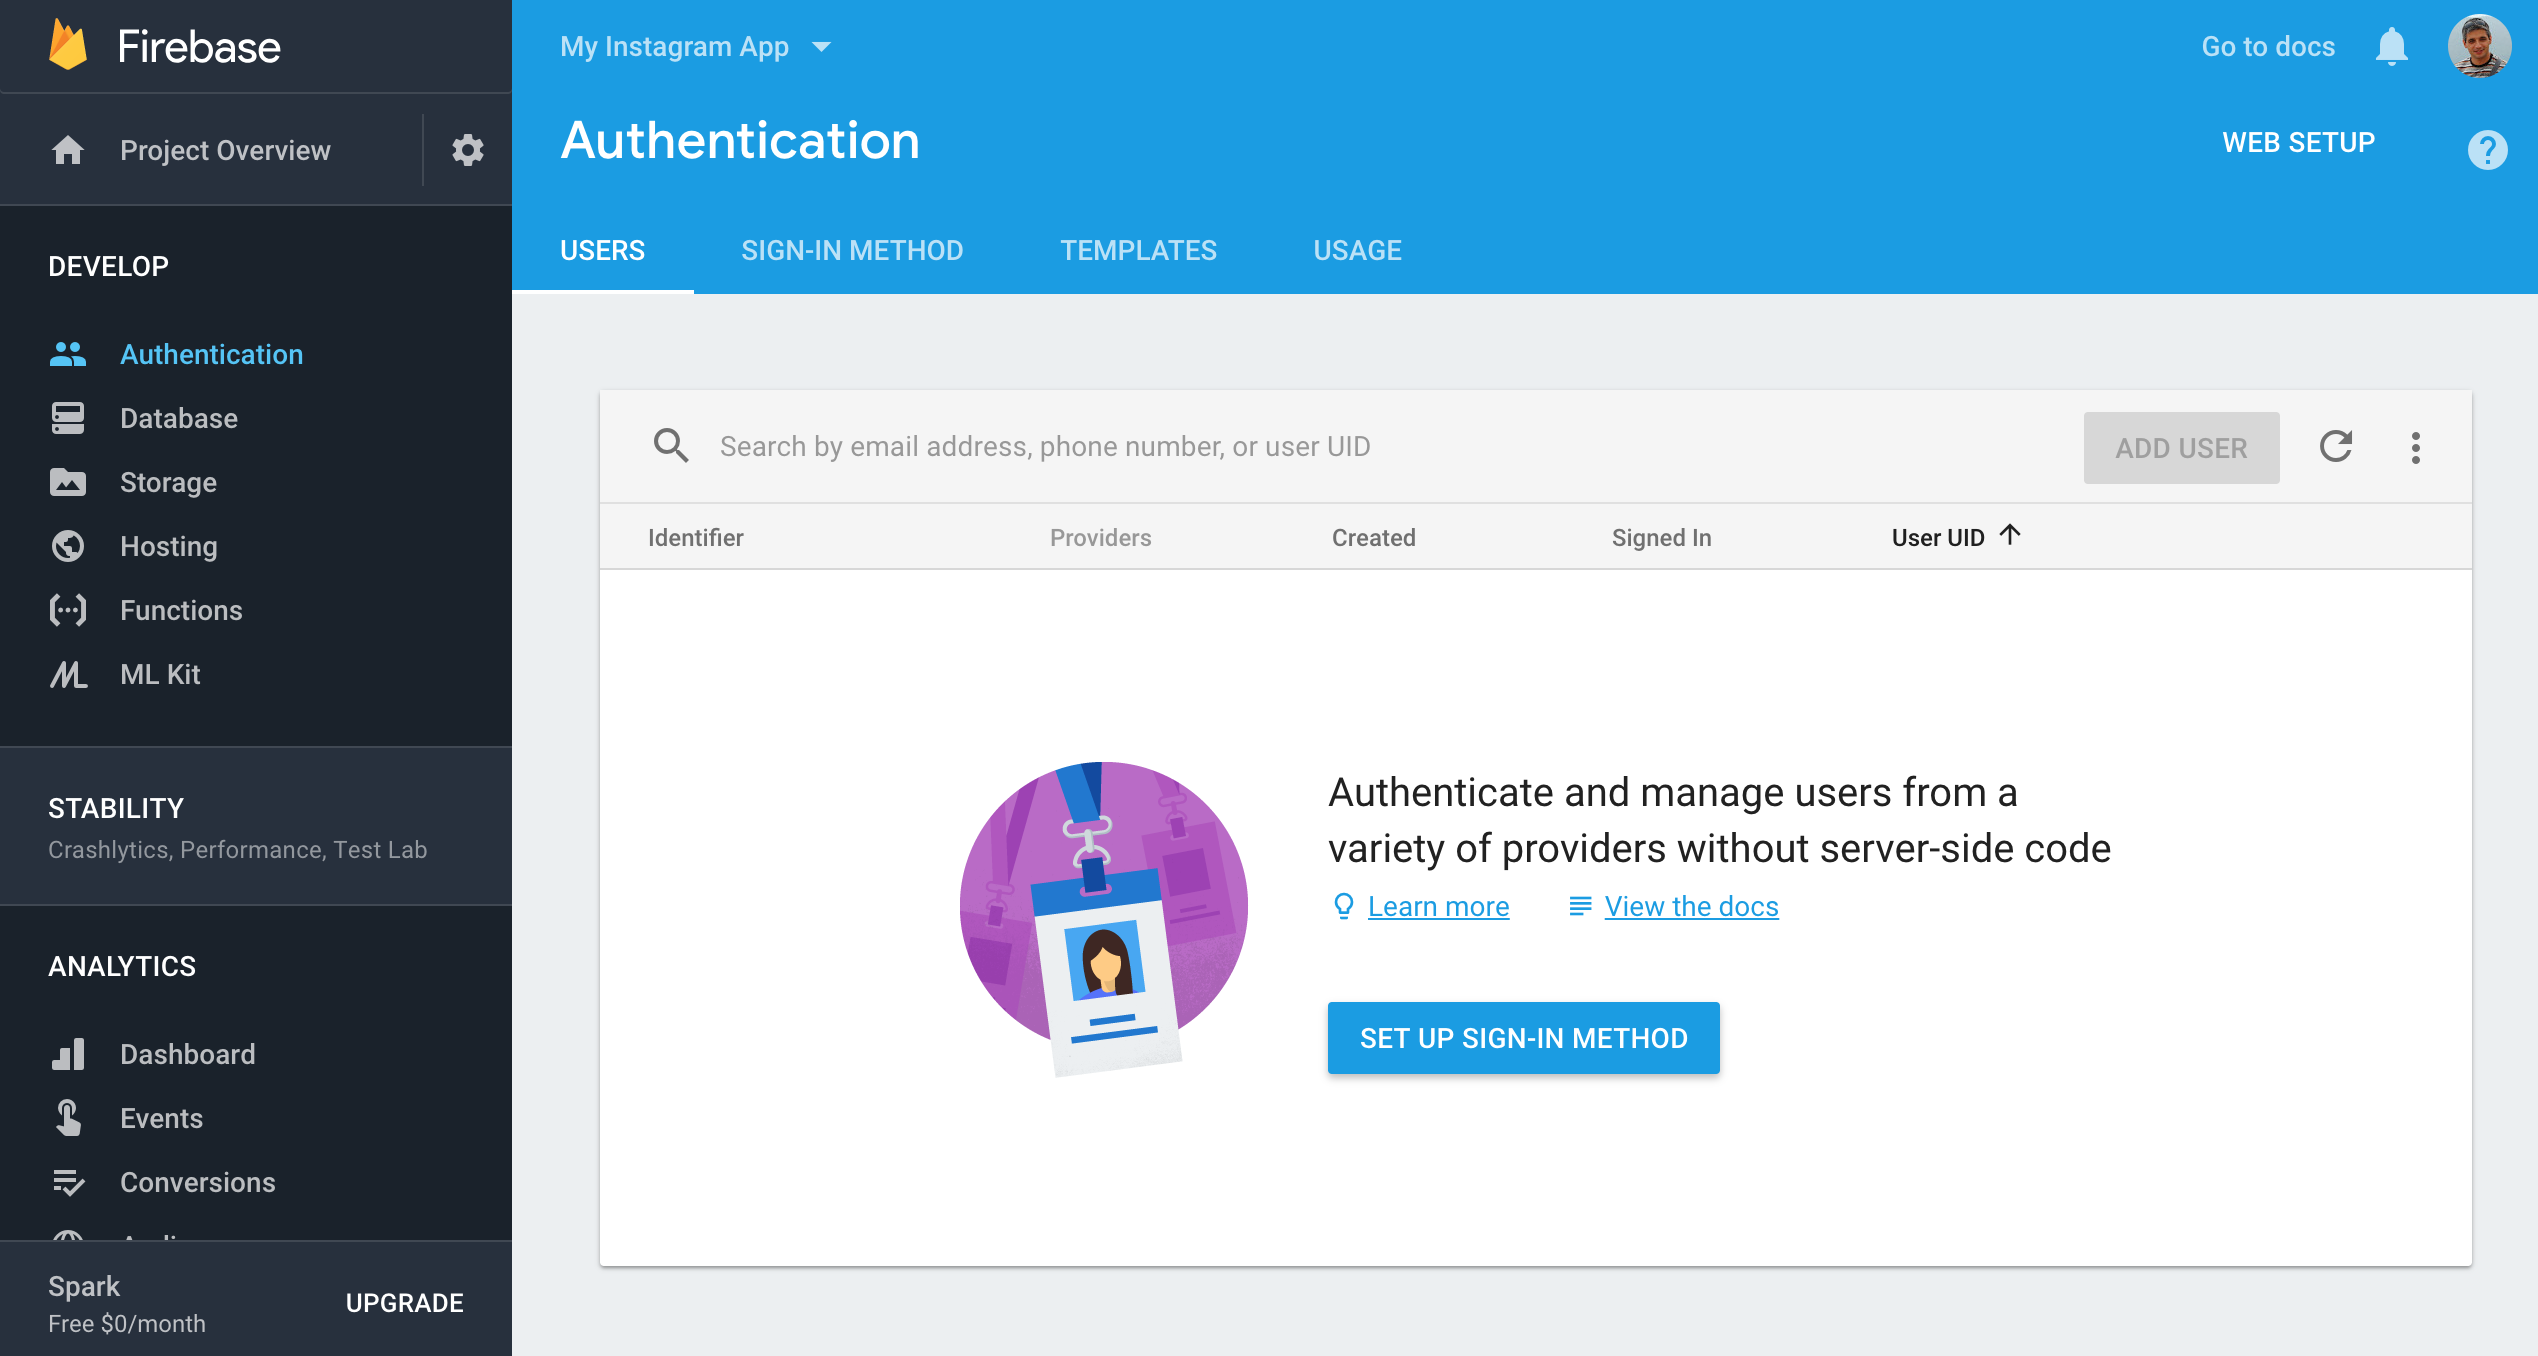
The first thing our users will need to do, is to authenticate themselves by entering an email and a password. Firebase offers this type of authentication (and much more) and even the interface for it, so we won’t have to code all the involved screens and dialogs. To use it in our app, first go to the Firebase Console, select our newly created project and, from the left menu, choose Authentication and click on the Set Up Sign-in Method button. From the list of Sign-in Providers, activate the Email/Password one.
Next, we need to add firebase-ui-auth to the app/build.gradle file:
dependencies {
    implementation fileTree(dir: 'libs', include: ['*.jar'])
    implementation 'com.android.support:appcompat-v7:27.1.0'
    implementation 'com.android.support.constraint:constraint-layout:1.1.0'
    testImplementation 'junit:junit:4.12'
    androidTestImplementation 'com.android.support.test:runner:1.0.2'
    androidTestImplementation 'com.android.support.test.espresso:espresso-core:3.0.2'
    implementation 'com.google.firebase:firebase-core:15.0.0'
    implementation 'com.firebaseui:firebase-ui-auth:3.3.1'
}

apply plugin: 'com.google.gms.google-services'
To start the authentication process, we will add a button in the activity_main.xml layout file:
<?xml version="1.0" encoding="utf-8"?>
<android.support.constraint.ConstraintLayout ...>

    <Button
        android:layout_width="wrap_content"
        android:layout_height="wrap_content"
        android:text="Sign In"
        app:layout_constraintBottom_toBottomOf="parent"
        app:layout_constraintLeft_toLeftOf="parent"
        app:layout_constraintRight_toRightOf="parent"
        app:layout_constraintTop_toTopOf="parent"
        android:onClick="signIn"/>

</android.support.constraint.ConstraintLayout>
This button will call the signIn method from our MainActivity class, that will start the Firebase Auth activity:
private static final int RC_SIGN_IN = 123;

public void signIn(View view) {
    startActivityForResult(
        // Get an instance of AuthUI based on the default app
        AuthUI.getInstance().createSignInIntentBuilder().build(),
        RC_SIGN_IN);
}
The authentication will return to our app in the onActivityResult method below. For now, we will only show a Toast with the user’s name or the error’s message if that’s the case.
@Override
protected void onActivityResult(int requestCode, int resultCode, Intent data) {
    super.onActivityResult(requestCode, resultCode, data);

    if (requestCode == RC_SIGN_IN) {
        IdpResponse response = IdpResponse.fromResultIntent(data);

        if (resultCode == RESULT_OK) {
            // Successfully signed in
            FirebaseUser fbUser = FirebaseAuth.getInstance().getCurrentUser();
            Toast.makeText(this, "Authenticated as " + fbUser.getDisplayName(), Toast.LENGTH_SHORT).show();
        } else {
            // Sign in failed, check response for error code
            if (response != null) {
                Toast.makeText(this, response.getError().getMessage(), Toast.LENGTH_SHORT).show();
            }
        }
    }
}
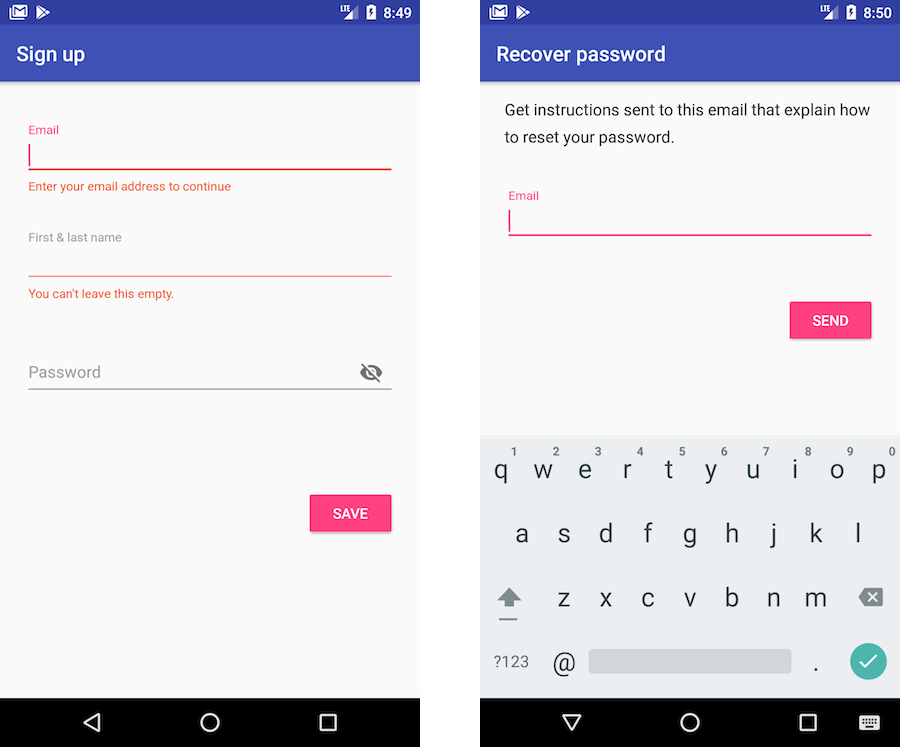
Run the app now to see how everything works. You even have a Recover password option without writing a single line of code for it!
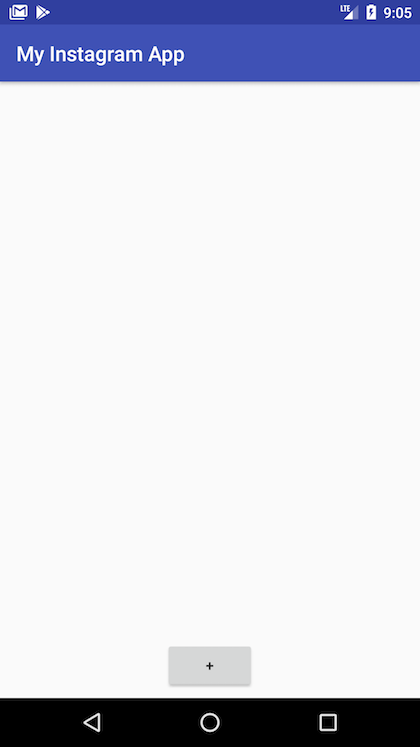
Creating the Feed Activity
After the user successfully authenticates to our app, he or she will need to be sent to the feed activity, to see the latest uploaded images. Let’s create a new, empty activity named FeedActivity. We will also add an uploadImage method, to be used later, when we will upload images to our app:
public class FeedActivity extends AppCompatActivity {

    @Override
    protected void onCreate(Bundle savedInstanceState) {
        super.onCreate(savedInstanceState);
        setContentView(R.layout.activity_feed);
    }

    public void uploadImage(View view) {

    }
}
In the activity_feed.xml layout file, add a button at the bottom that will be used to upload new images to our app:
<?xml version="1.0" encoding="utf-8"?>
<android.support.constraint.ConstraintLayout...>

    <Button
        android:id="@+id/uploadButton"
        android:layout_width="wrap_content"
        android:layout_height="wrap_content"
        android:layout_marginBottom="8dp"
        android:layout_marginEnd="8dp"
        android:layout_marginLeft="8dp"
        android:layout_marginRight="8dp"
        android:layout_marginStart="8dp"
        android:onClick="uploadImage"
        android:text="+"
        app:layout_constraintBottom_toBottomOf="parent"
        app:layout_constraintEnd_toEndOf="parent"
        app:layout_constraintStart_toStartOf="parent" />

</android.support.constraint.ConstraintLayout>
From the MainActivity, start this new one, if the user is already authenticated, or when the authentication succeeds:
public class MainActivity extends AppCompatActivity {

    // ...

    @Override
    protected void onCreate(Bundle savedInstanceState) {
        super.onCreate(savedInstanceState);
        setContentView(R.layout.activity_main);

        FirebaseUser fbUser = FirebaseAuth.getInstance().getCurrentUser();
        if(fbUser != null) {
            // User already signed in
            // go to feed activity
            Intent intent = new Intent(this, FeedActivity.class);
            startActivity(intent);
        }
    }

    // ...

    @Override
    protected void onActivityResult(int requestCode, int resultCode, Intent data) {
        super.onActivityResult(requestCode, resultCode, data);

        if (requestCode == RC_SIGN_IN) {
            IdpResponse response = IdpResponse.fromResultIntent(data);

            if (resultCode == RESULT_OK) {
                // Successfully signed in
                // go to feed activity
                Intent intent = new Intent(this, FeedActivity.class);
                startActivity(intent);
            } else {
                // Sign in failed, check response for error code
                if (response != null) {
                    Toast.makeText(this, response.getError().getMessage(), Toast.LENGTH_SHORT).show();
                }
            }
        }
    }
}
Uploading Images to Firebase Storage
We will use the Firebase Storage to keep the images uploaded by our users in the app. Like we did before for authentication, we need to go back to the Firebase Console and enable the Storage option:
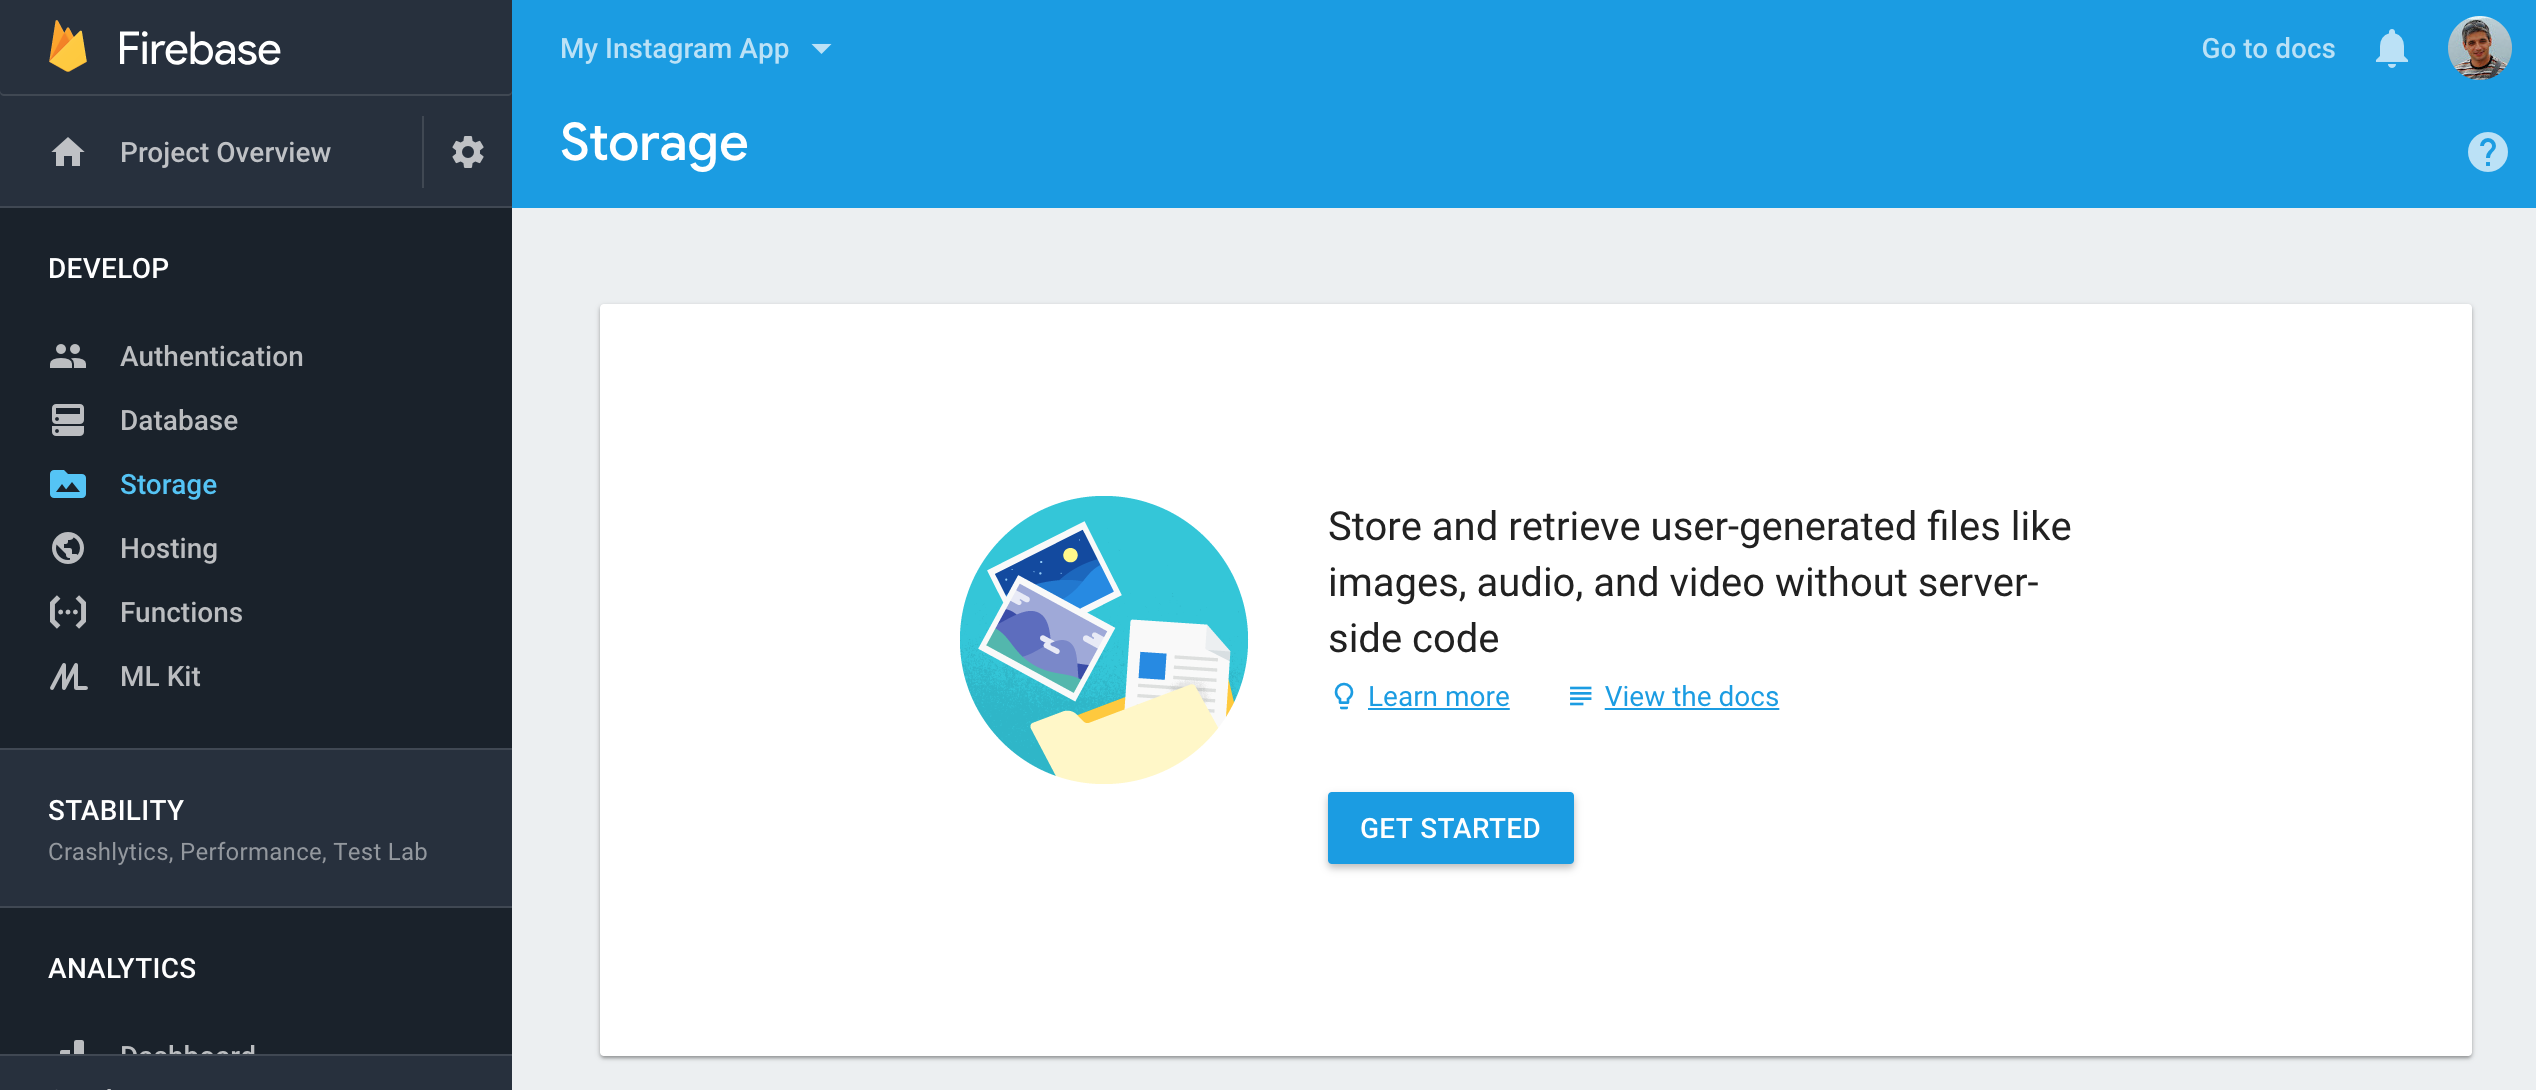
We will keep the default security rules that allow all our authenticated users to read and write files to the provided storage.
Back in the FeedActivity, let’s add the code to load an image from the device’s gallery. You could also add code to take images using the camera, but, as this is out of this tutorial scope, we will skip this part. You can see how this can be done by following the How to Build a Jigsaw Puzzle Android Game tutorial published earlier.
Start by adding the READ_EXTERNAL_STORAGE permission to the AndroidManifest.xml file:
<?xml version="1.0" encoding="utf-8"?>
<manifest xmlns:android="http://schemas.android.com/apk/res/android"
    package="com.dragosholban.myinstagramclone">

    <uses-permission android:name="android.permission.READ_EXTERNAL_STORAGE" />

    <application
        ... >
        ...
    </application>

</manifest>
The actual code from the FeedActivity, that requests and receives an image from the device’s storage, follows:
public class FeedActivity extends AppCompatActivity {

    static final int RC_PERMISSION_READ_EXTERNAL_STORAGE = 1;
    static final int RC_IMAGE_GALLERY = 2;

    // ...

    public void uploadImage(View view) {
        if (ContextCompat.checkSelfPermission(this, Manifest.permission.READ_EXTERNAL_STORAGE) != PackageManager.PERMISSION_GRANTED) {
            ActivityCompat.requestPermissions(this, new String[] {Manifest.permission.READ_EXTERNAL_STORAGE}, RC_PERMISSION_READ_EXTERNAL_STORAGE);
        } else {
            Intent intent = new Intent(Intent.ACTION_GET_CONTENT);
            intent.setType("image/*");
            startActivityForResult(intent, RC_IMAGE_GALLERY);
        }
    }

    @Override
    public void onRequestPermissionsResult(int requestCode, @NonNull String[] permissions, @NonNull int[] grantResults) {
        if (requestCode == RC_PERMISSION_READ_EXTERNAL_STORAGE) {
            if (grantResults.length > 0 && grantResults[0] == PackageManager.PERMISSION_GRANTED) {
                Intent intent = new Intent(Intent.ACTION_GET_CONTENT);
                intent.setType("image/*");
                startActivityForResult(intent, RC_IMAGE_GALLERY);
            }
        }
    }

    @Override
    protected void onActivityResult(int requestCode, int resultCode, Intent data) {
        if (requestCode == RC_IMAGE_GALLERY && resultCode == RESULT_OK) {
            Uri uri = data.getData();
        }
    }
}
Once we get the image Uri, we can upload it to the Firebase storage. For this, we need yet another dependency added to our app’s build.gradle file:
dependencies {
    ...
    implementation 'com.google.firebase:firebase-core:15.0.0'
    implementation 'com.firebaseui:firebase-ui-auth:3.3.1'
    implementation 'com.google.firebase:firebase-storage:15.0.0'
}
Finally, in the FeedActivity, Firebase is ready to handle the upload with a few lines of code:
public class FeedActivity extends AppCompatActivity {

    FirebaseUser fbUser;

    // ...

    @Override
    protected void onCreate(Bundle savedInstanceState) {
        super.onCreate(savedInstanceState);
        setContentView(R.layout.activity_feed);

        fbUser = FirebaseAuth.getInstance().getCurrentUser();
        if (fbUser == null) {
            finish();
        }
    }

    // ...

    @Override
    protected void onActivityResult(int requestCode, int resultCode, Intent data) {
        if (requestCode == RC_IMAGE_GALLERY && resultCode == RESULT_OK) {
            Uri uri = data.getData();

            StorageReference storageRef = FirebaseStorage.getInstance().getReference();
            StorageReference imagesRef = storageRef.child("images");
            StorageReference userRef = imagesRef.child(fbUser.getUid());
            String timeStamp = new SimpleDateFormat("yyyyMMdd_HHmmss").format(new Date());
            String filename = fbUser.getUid() + "_" + timeStamp;
            StorageReference fileRef = userRef.child(filename);

            UploadTask uploadTask = fileRef.putFile(uri);
            uploadTask.addOnFailureListener(new OnFailureListener() {
                @Override
                public void onFailure(@NonNull Exception exception) {
                    // Handle unsuccessful uploads
                    Toast.makeText(FeedActivity.this, "Upload failed!\n" + exception.getMessage(), Toast.LENGTH_LONG).show();
                }
            }).addOnSuccessListener(new OnSuccessListener<UploadTask.TaskSnapshot>() {
                @Override
                public void onSuccess(UploadTask.TaskSnapshot taskSnapshot) {
                    Uri downloadUrl = taskSnapshot.getDownloadUrl();
                    Toast.makeText(FeedActivity.this, "Upload finished!", Toast.LENGTH_SHORT).show();
                }
            });
        }
    }
}
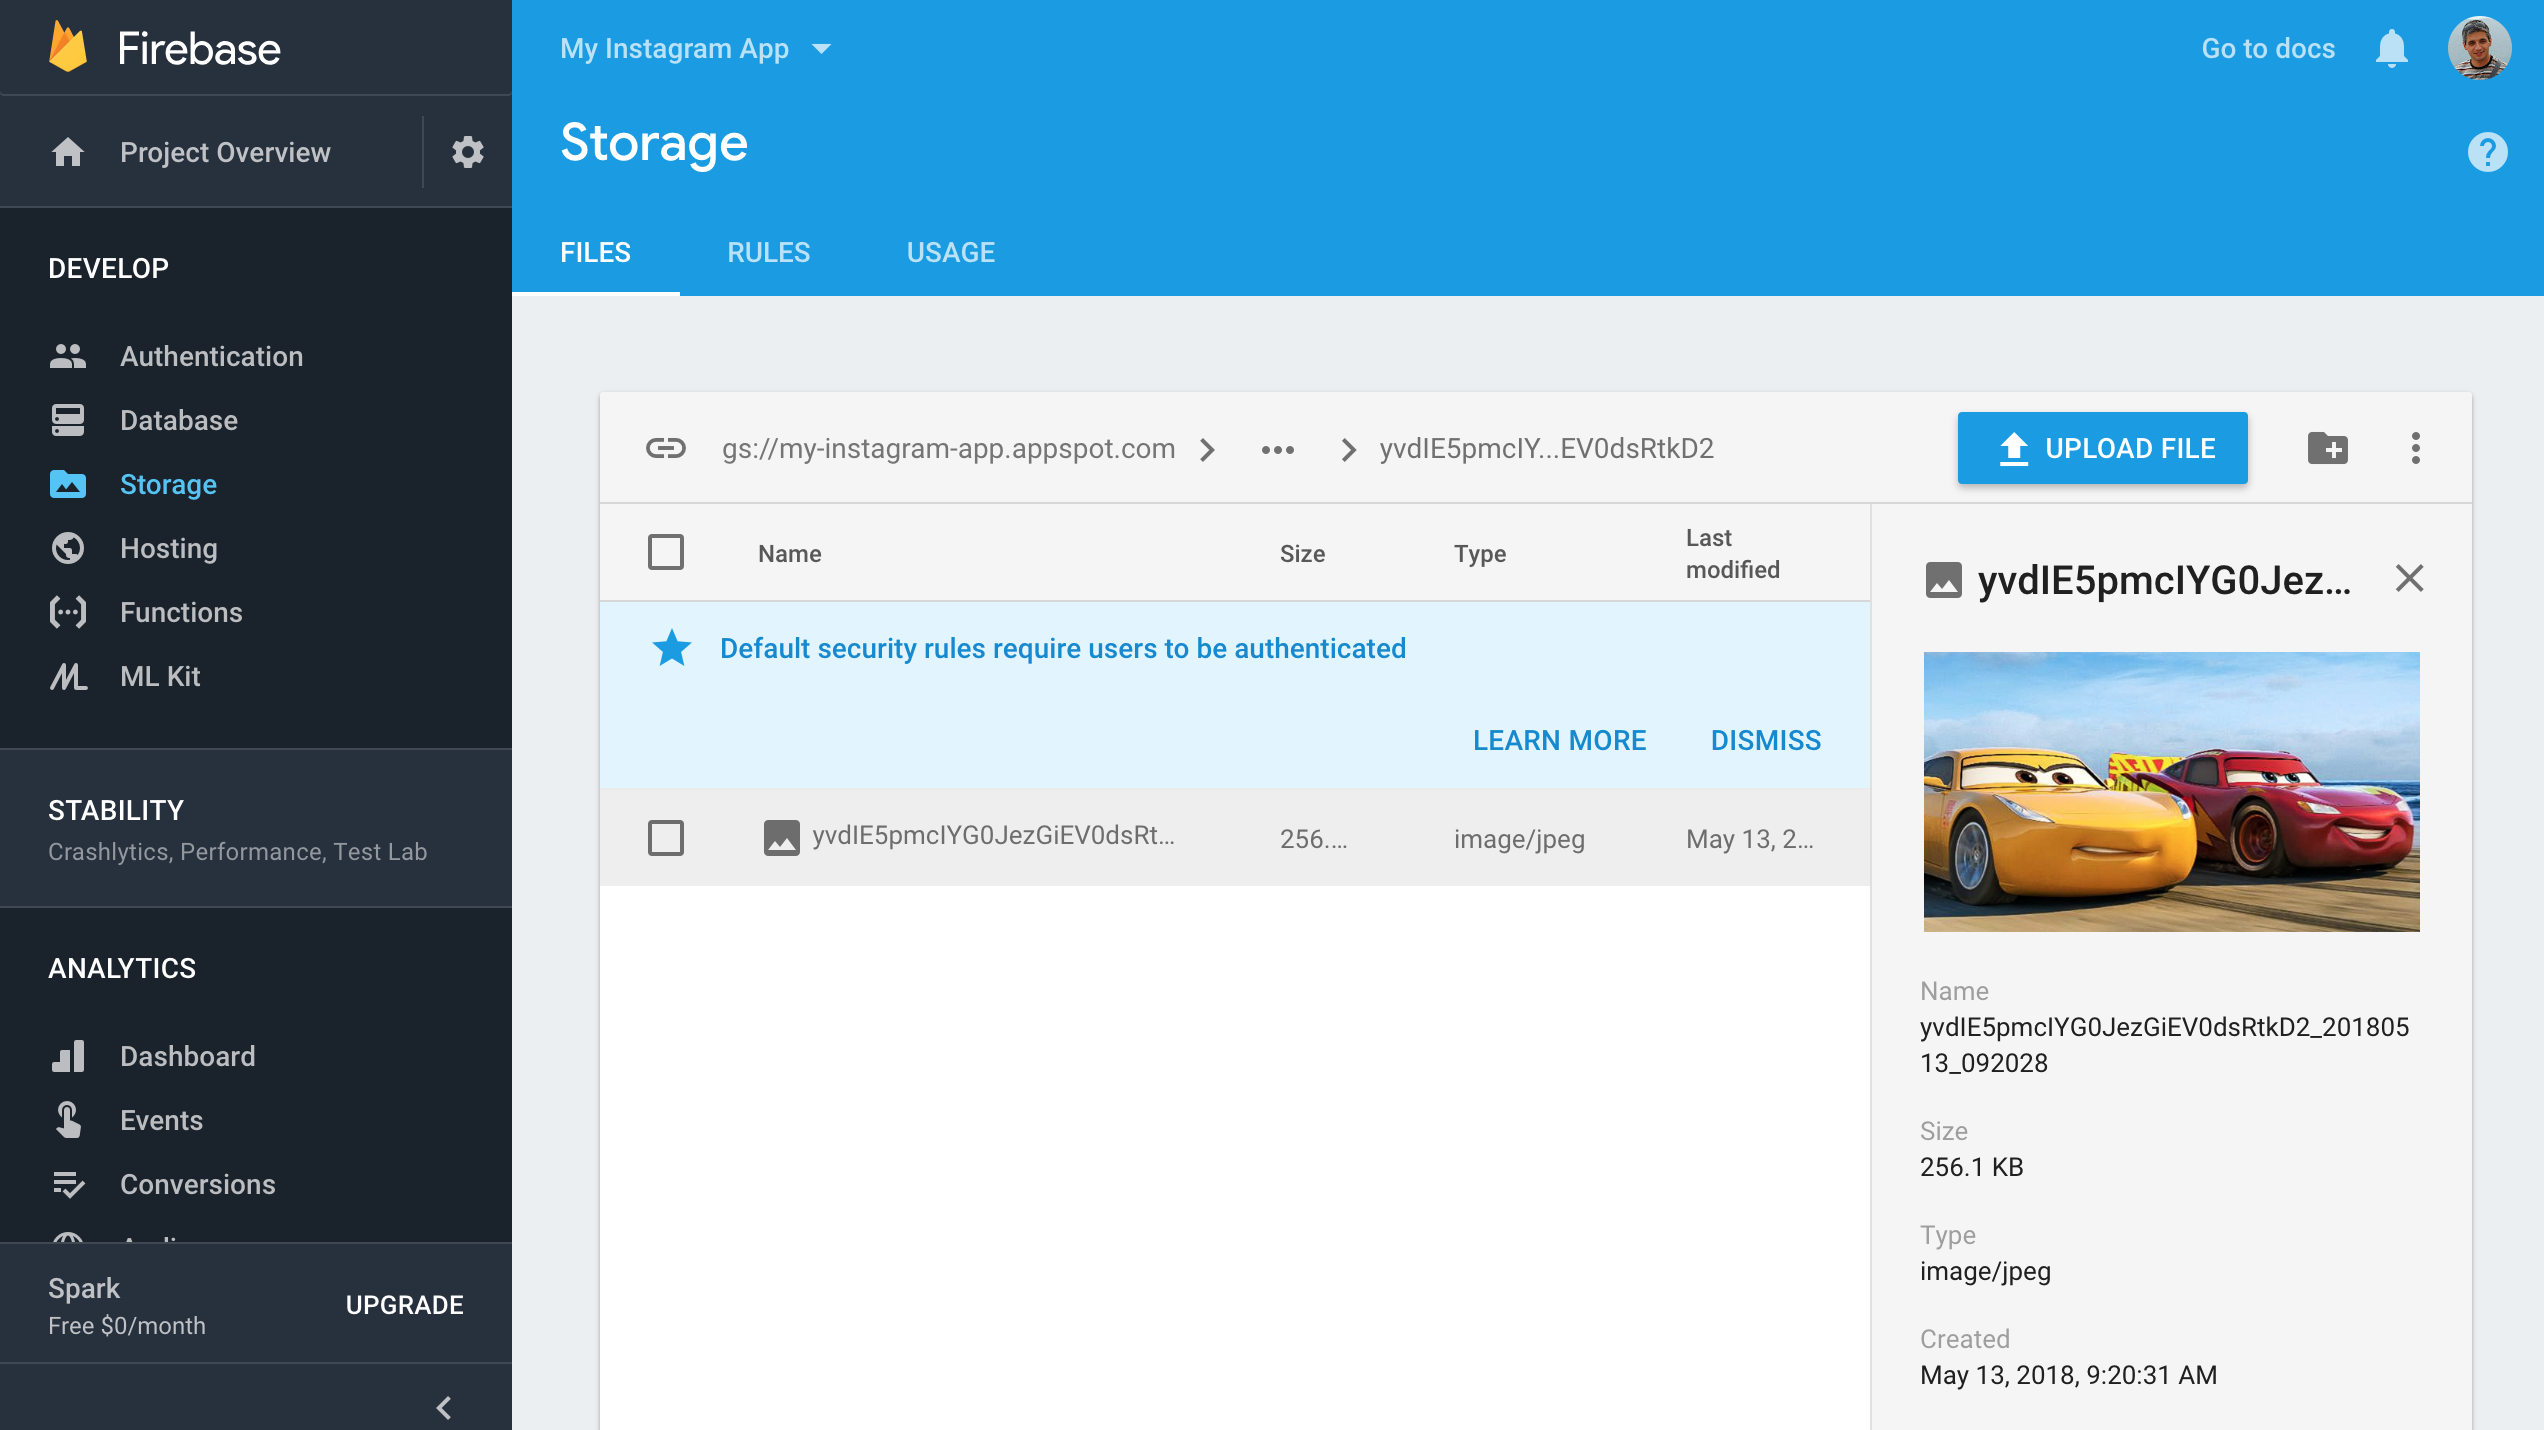
Run the app now, click on the button and select an image. After a few moments it will be uploaded to the Firebase servers and you can open the console to see the result:
Saving Data to the Firebase Database
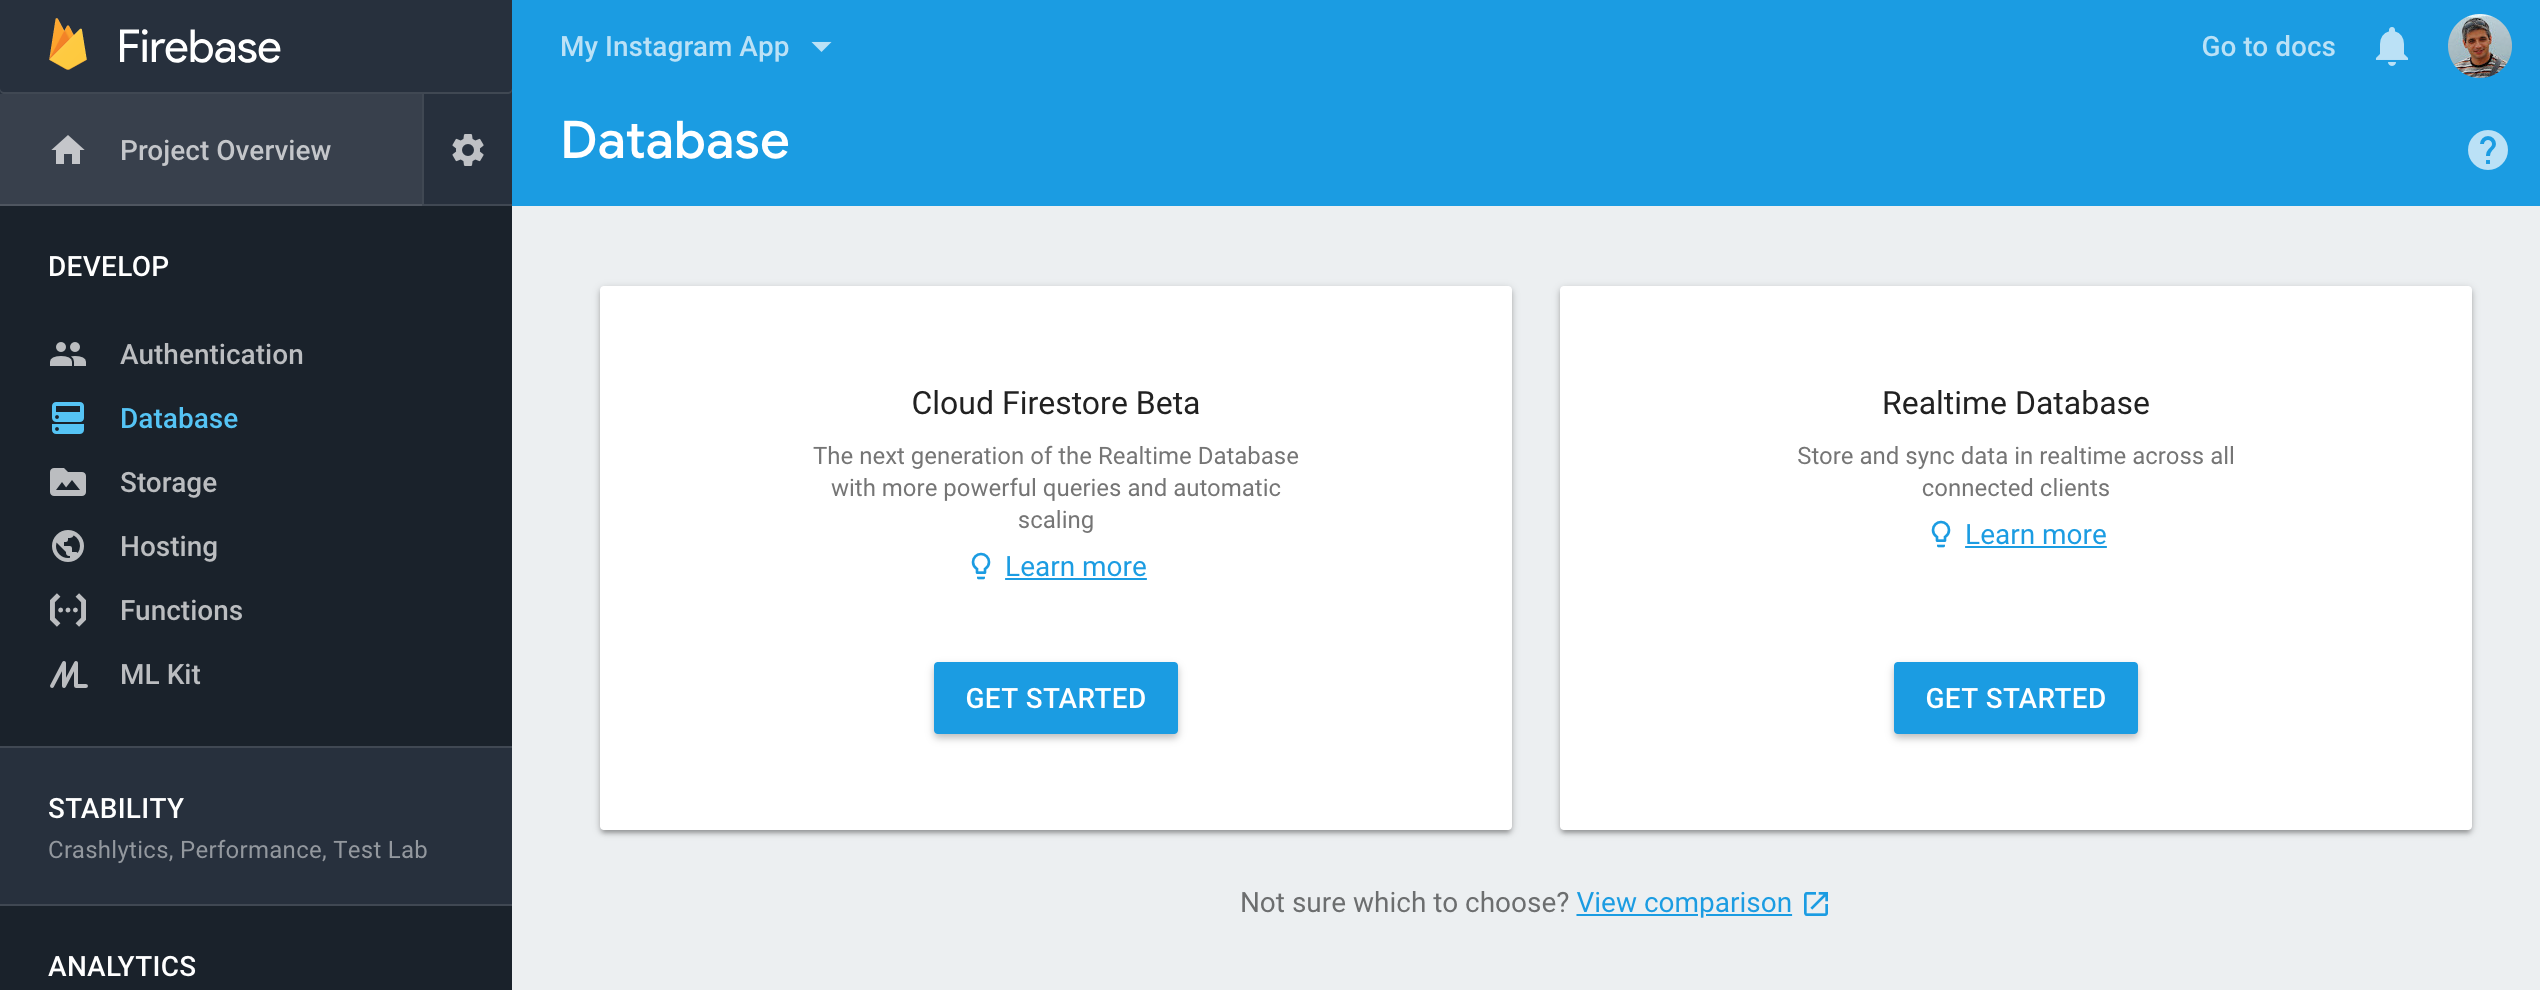
If we want to list the uploaded images in our feed activity, we need to keep track of all the uploaded files and the users who own them. For this we will use another Firebase service, the Realtime Database. To use it, activate it from the Firebase Console and choose the locked mode security rules when prompted.
To be able to save data, we need to change the security rules to allow our authenticate users to read and write to the database. Select the Rules tab and change the security rules to the following:
{
  "rules": {
    ".read": "auth != null",
    ".write": "auth != null"
  }
}
Now, add the necessary dependency to the app’s build.gradle file and sync the project:
dependencies {
    ...
    implementation 'com.google.firebase:firebase-core:15.0.0'
    implementation 'com.firebaseui:firebase-ui-auth:3.3.1'
    implementation 'com.google.firebase:firebase-storage:15.0.0'
    implementation 'com.google.firebase:firebase-database:15.0.0'
}
Before actually saving anything, we will ned to define some Java classes that will hold objects to be saved in the database (our models). First, we’ll define the User model:
@IgnoreExtraProperties
public class User {
    public String uid;
    public String displayName;
    public String token;

    public User() {
        // Default constructor required for calls to DataSnapshot.getValue(User.class)
    }

    public User(String uid, String displayName, String token) {
        this.uid = uid;
        this.displayName = displayName;
        this.token = token;
    }
}
Next, follows the Image class:
@IgnoreExtraProperties
public class Image {
    public String key;
    public String userId;
    public String downloadUrl;

    // these properties will not be saved to the database
    @Exclude
    public User user;

    @Exclude
    public int likes = 0;

    @Exclude
    public boolean hasLiked = false;

    @Exclude
    public String userLike;

    public Image() {
        // Default constructor required for calls to DataSnapshot.getValue(User.class)
    }

    public Image(String key, String userId, String downloadUrl) {
        this.key = key;
        this.userId = userId;
        this.downloadUrl = downloadUrl;
    }

    public void addLike() {
        this.likes++;
    }

    public void removeLike() {
        this.likes--;
    }
}
Finally, the Like class:
@IgnoreExtraProperties
public class Like {
    public String imageId;
    public String userId;

    public Like() {
        // Default constructor required for calls to DataSnapshot.getValue(Like.class)
    }

    public Like(String imageId, String userId) {
        this.imageId = imageId;
        this.userId = userId;
    }
}
We’ll start by saving our users to the database. This is done in the MainActivity class, after the user signs in:
public class MainActivity extends AppCompatActivity {

    DatabaseReference database;

    private static final int RC_SIGN_IN = 123;

    @Override
    protected void onCreate(Bundle savedInstanceState) {
        super.onCreate(savedInstanceState);
        setContentView(R.layout.activity_main);

        database = FirebaseDatabase.getInstance().getReference();

        FirebaseUser fbUser = FirebaseAuth.getInstance().getCurrentUser();
        if(fbUser != null) {
            // User already signed in

            // get the FCM token
            String token = FirebaseInstanceId.getInstance().getToken();

            // save the user info in the database to users/UID/
            // we'll use the UID as part of the path
            User user = new User(fbUser.getUid(), fbUser.getDisplayName(), token);
            database.child("users").child(user.uid).setValue(user);

            // go to feed activity
            Intent intent = new Intent(this, FeedActivity.class);
            startActivity(intent);
        }
    }

    // ...

    @Override
    protected void onActivityResult(int requestCode, int resultCode, Intent data) {
        super.onActivityResult(requestCode, resultCode, data);

        if (requestCode == RC_SIGN_IN) {
            IdpResponse response = IdpResponse.fromResultIntent(data);

            if (resultCode == RESULT_OK) {
                // Successfully signed in

                // get the Firebase user
                FirebaseUser fbUser = FirebaseAuth.getInstance().getCurrentUser();

                // get the FCM token
                String token = FirebaseInstanceId.getInstance().getToken();

                // save the user info in the database to users/UID/
                // we'll use the UID as part of the path
                User user = new User(fbUser.getUid(), fbUser.getDisplayName(), token);
                database.child("users").child(user.uid).setValue(user);

                // go to feed activity
                Intent intent = new Intent(this, FeedActivity.class);
                startActivity(intent);
            } else {
                // Sign in failed, check response for error code
                if (response != null) {
                    Toast.makeText(this, response.getError().getMessage(), Toast.LENGTH_SHORT).show();
                }
            }
        }
    }
}
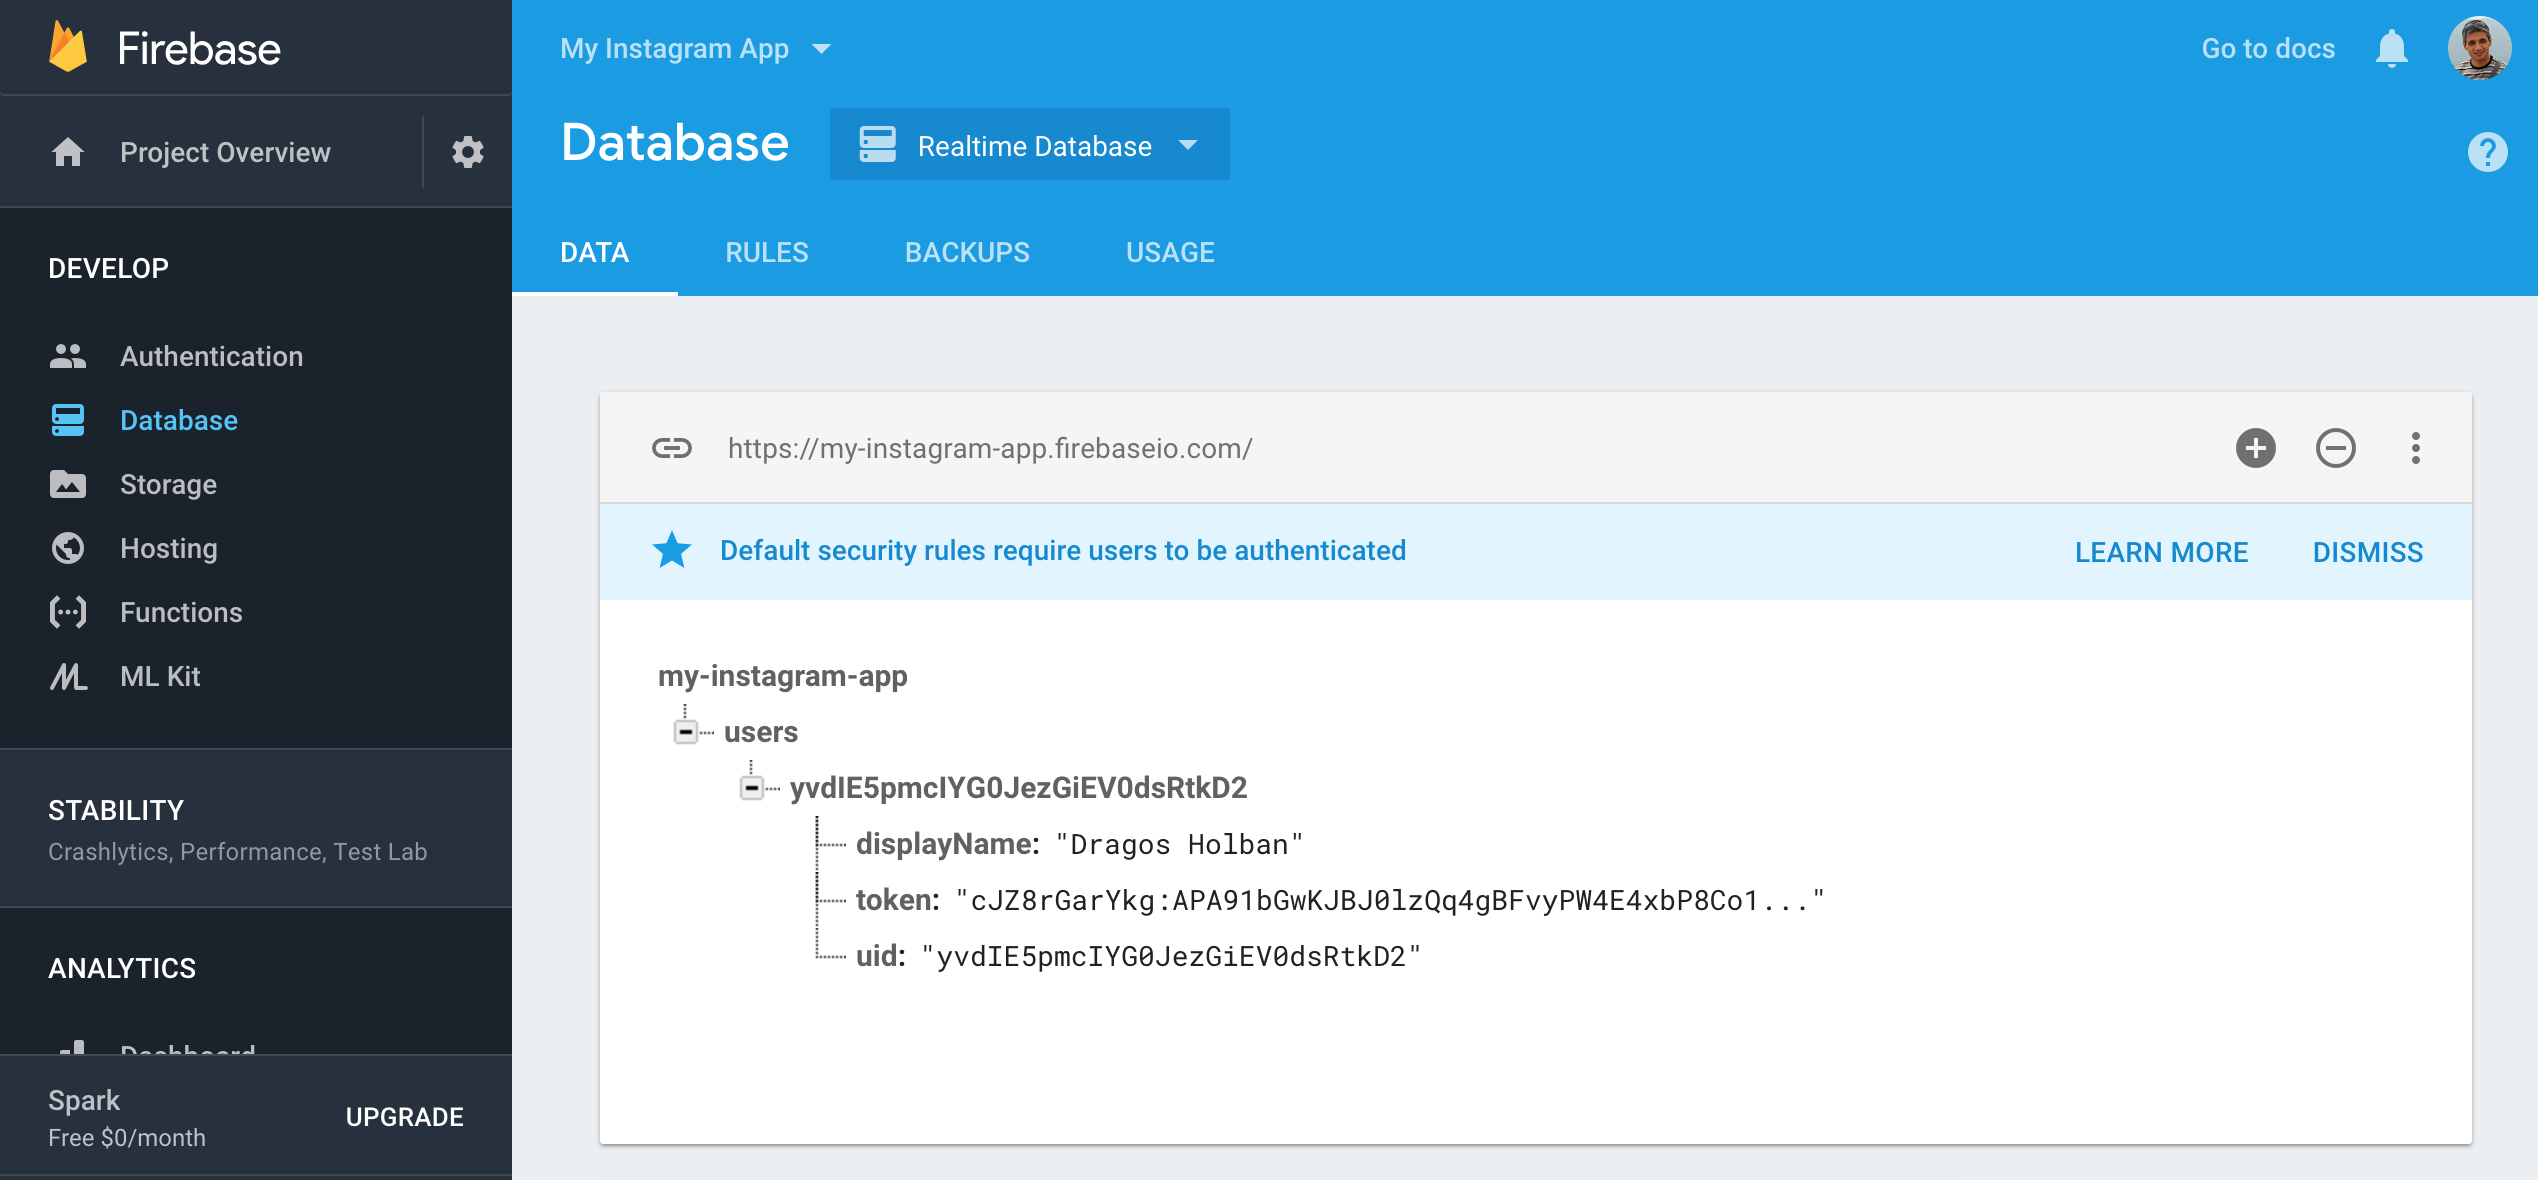
Run the app now and sign in again using Firebase authentication. Then go to the console and check the database section. You should see a new user added:
Let’s continue by saving the uploaded images URLs to our database. This is done in our FeedActivity class, after an upload has finished (this part can be improved by cropping and resizing the images before uploading):
public class FeedActivity extends AppCompatActivity {

    FirebaseUser user;
    DatabaseReference database;

    // ...

    @Override
    protected void onCreate(Bundle savedInstanceState) {
        super.onCreate(savedInstanceState);
        // ...

        database = FirebaseDatabase.getInstance().getReference();
    }

    // ...

    @Override
    protected void onActivityResult(int requestCode, int resultCode, Intent data) {
        if (requestCode == RC_IMAGE_GALLERY && resultCode == RESULT_OK) {
            Uri uri = data.getData();

            // ...

            UploadTask uploadTask = fileRef.putFile(uri);
            uploadTask.addOnFailureListener(new OnFailureListener() {
                @Override
                public void onFailure(@NonNull Exception exception) {
                    // Handle unsuccessful uploads
                    Toast.makeText(FeedActivity.this, "Upload failed!\n" + exception.getMessage(), Toast.LENGTH_LONG).show();
                }
            }).addOnSuccessListener(new OnSuccessListener<UploadTask.TaskSnapshot>() {
                @Override
                public void onSuccess(UploadTask.TaskSnapshot taskSnapshot) {
                    Uri downloadUrl = taskSnapshot.getDownloadUrl();
                    Toast.makeText(FeedActivity.this, "Upload finished!", Toast.LENGTH_SHORT).show();

                    // save image to database
                    String key = database.child("images").push().getKey();
                    Image image = new Image(key, fbUser.getUid(), downloadUrl.toString());
                    database.child("images").child(key).setValue(image);
                }
            });
        }
    }
}
That’s all! Run the app again and upload some images. Then check the database using the Firebase Console. You will see them added under the /images path:
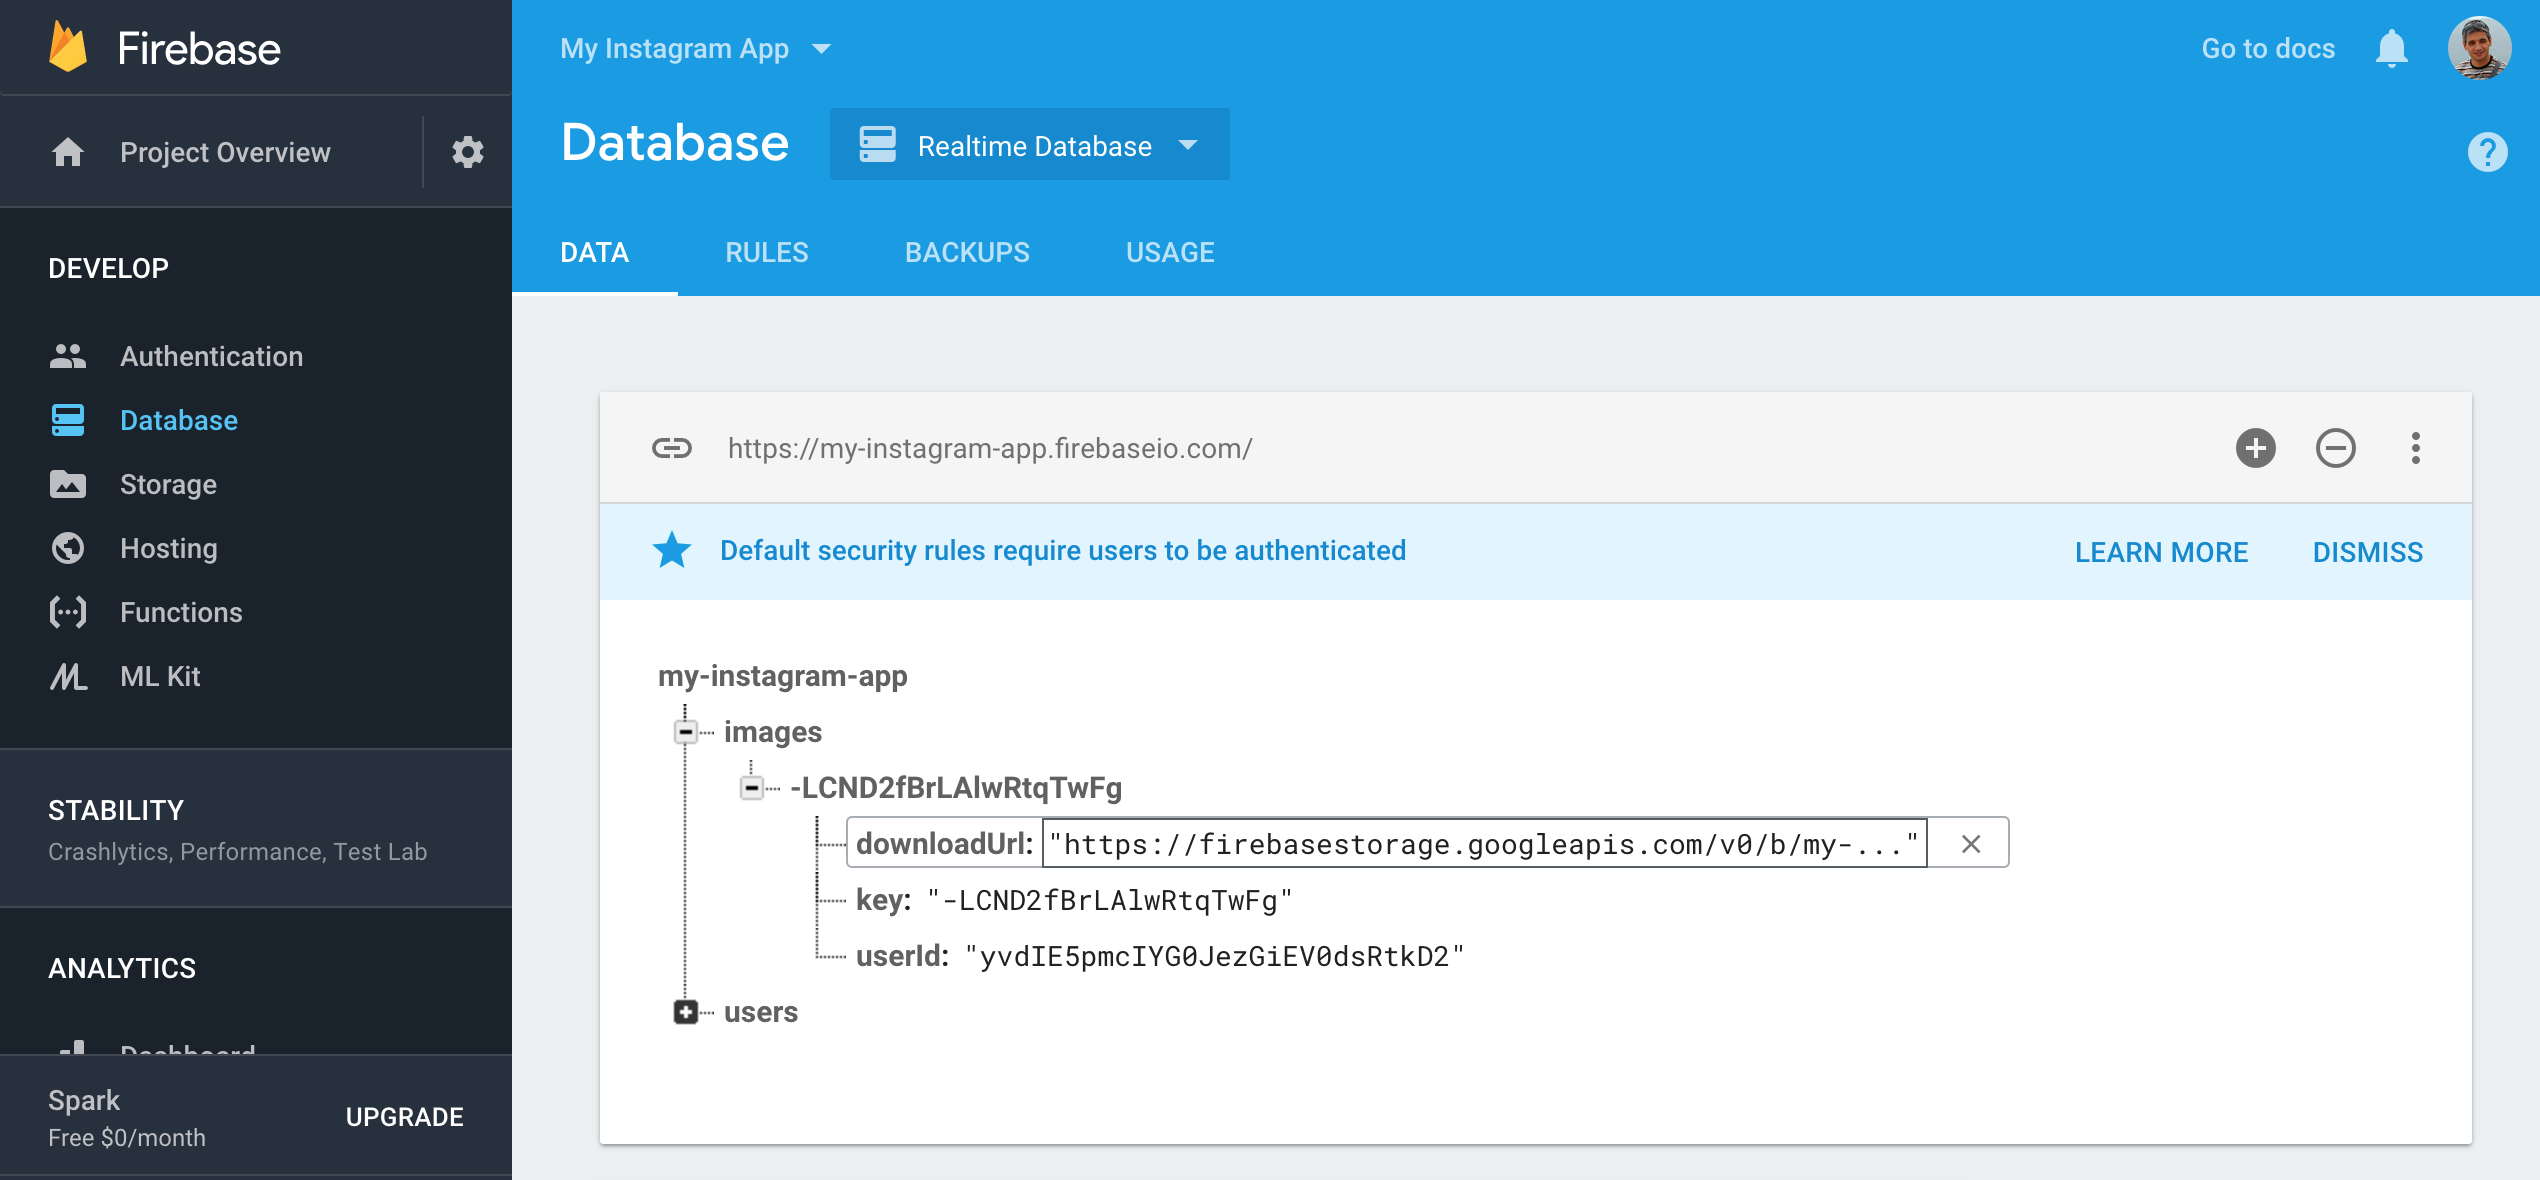
Loading Data from the Firebase Database
Our users can now add photos but there is no way they can see the images. Let’s fix this in this section.
First let’s add a RecyclerView to our activity_feed.xml layout file, to have a place to show images in our app:
<?xml version="1.0" encoding="utf-8"?>
<android.support.constraint.ConstraintLayout ...">

    <Button
        ... />

    <android.support.v7.widget.RecyclerView
        android:id="@+id/recyclerView"
        android:layout_width="0dp"
        android:layout_height="0dp"
        android:layout_marginBottom="8dp"
        android:layout_marginEnd="8dp"
        android:layout_marginLeft="8dp"
        android:layout_marginRight="8dp"
        android:layout_marginStart="8dp"
        android:layout_marginTop="8dp"
        app:layout_constraintBottom_toTopOf="@+id/uploadButton"
        app:layout_constraintEnd_toEndOf="parent"
        app:layout_constraintStart_toStartOf="parent"
        app:layout_constraintTop_toTopOf="parent" />

</android.support.constraint.ConstraintLayout>
We will also need a new layout file for the elements loaded by the RecyclerView. Create a new layout file named image_view.xml with the following contents:
<?xml version="1.0" encoding="utf-8"?>
<android.support.constraint.ConstraintLayout
    xmlns:android="http://schemas.android.com/apk/res/android"
    xmlns:app="http://schemas.android.com/apk/res-auto"
    xmlns:tools="http://schemas.android.com/tools"
    android:layout_width="match_parent"
    android:layout_height="wrap_content">

    <ImageView
        android:id="@+id/imageView"
        android:layout_width="match_parent"
        android:layout_height="wrap_content"
        android:layout_marginBottom="8dp"
        android:layout_marginEnd="8dp"
        android:layout_marginLeft="8dp"
        android:layout_marginRight="8dp"
        android:layout_marginStart="8dp"
        android:layout_marginTop="8dp"
        app:layout_constraintBottom_toTopOf="@+id/textView2"
        app:layout_constraintEnd_toEndOf="parent"
        app:layout_constraintStart_toStartOf="parent"
        app:layout_constraintTop_toTopOf="parent"
        android:adjustViewBounds="true" />

    <TextView
        android:id="@+id/textView2"
        android:layout_width="0dp"
        android:layout_height="wrap_content"
        android:layout_marginBottom="8dp"
        android:layout_marginEnd="8dp"
        android:layout_marginLeft="8dp"
        android:layout_marginRight="8dp"
        android:layout_marginStart="8dp"
        app:layout_constraintBottom_toBottomOf="parent"
        app:layout_constraintEnd_toStartOf="@id/likeButton"
        app:layout_constraintStart_toStartOf="parent" />

    <Button
        android:id="@+id/likeButton"
        android:layout_width="wrap_content"
        android:layout_height="wrap_content"
        android:layout_marginBottom="8dp"
        android:layout_marginEnd="8dp"
        android:layout_marginLeft="8dp"
        android:layout_marginRight="8dp"
        android:layout_marginStart="8dp"
        android:text="Like"
        app:layout_constraintBottom_toBottomOf="parent"
        app:layout_constraintEnd_toEndOf="parent"
        app:layout_constraintStart_toEndOf="@id/textView2" />

</android.support.constraint.ConstraintLayout>
Next, we need an adapter for our RecyclerView, create a new ImageAdapter Java class for it:
public class ImageAdapter extends RecyclerView.Adapter<ImageAdapter.ViewHolder> {
    private ArrayList<Image> mDataset;
    private FeedActivity mActivity;

    public static class ViewHolder extends RecyclerView.ViewHolder {
        public TextView mTextView;
        public ImageView mImageView;
        public Button mLikeButton;

        public ViewHolder(View v) {
            super(v);
            mTextView = v.findViewById(R.id.textView2);
            mImageView = v.findViewById(R.id.imageView);
            mLikeButton = v.findViewById(R.id.likeButton);
        }
    }

    public ImageAdapter(ArrayList<Image> myDataset, FeedActivity activity) {
        mDataset = myDataset;
        mActivity = activity;
    }

    // Create new views (invoked by the layout manager)
    @Override
    public ImageAdapter.ViewHolder onCreateViewHolder(ViewGroup parent,
                                                      int viewType) {
        // create a new view
        View v = LayoutInflater.from(parent.getContext())
                .inflate(R.layout.image_view, parent, false);

        ViewHolder vh = new ViewHolder(v);
        return vh;
    }

    // Replace the contents of a view (invoked by the layout manager)
    @Override
    public void onBindViewHolder(ViewHolder holder, final int position) {
        final Image image = (Image) mDataset.get(position);
        if (image.user != null) {
            holder.mTextView.setText(image.user.displayName);
        }
        Picasso.get().load(image.downloadUrl).into(holder.mImageView);
    }

    // Return the size of your dataset (invoked by the layout manager)
    @Override
    public int getItemCount() {
        return mDataset.size();
    }

    public void addImage(Image image) {
        mDataset.add(0, image);
        notifyDataSetChanged();
    }
}
This uses the Picasso library to load images from the internet, so add it to the app’s build.gradle file:
dependencies {
    ...
    implementation 'com.google.firebase:firebase-core:15.0.0'
    implementation 'com.firebaseui:firebase-ui-auth:3.3.1'
    implementation 'com.google.firebase:firebase-storage:15.0.0'
    implementation 'com.google.firebase:firebase-database:15.0.0'
    implementation 'com.squareup.picasso:picasso:2.71828'
}
Finally, in the FeedActivity class, add the code to load data from the Firebase database:
public class FeedActivity extends AppCompatActivity {

    FirebaseUser user;
    DatabaseReference database;
    RecyclerView recyclerView;
    RecyclerView.LayoutManager mLayoutManager;
    ImageAdapter mAdapter;
    ArrayList<Image> images = new ArrayList<>();

    // ...

    @Override
    protected void onCreate(Bundle savedInstanceState) {
        // ...

        database = FirebaseDatabase.getInstance().getReference();

        // Setup the RecyclerView
        recyclerView = findViewById(R.id.recyclerView);
        mLayoutManager = new LinearLayoutManager(this);
        recyclerView.setLayoutManager(mLayoutManager);
        mAdapter = new ImageAdapter(images, this);
        recyclerView.setAdapter(mAdapter);

        // Get the latest 100 images
        Query imagesQuery = database.child("images").orderByKey().limitToFirst(100);
        imagesQuery.addChildEventListener(new ChildEventListener() {
            @Override
            public void onChildAdded(DataSnapshot dataSnapshot, String s) {

                // A new image has been added, add it to the displayed list
                final Image image = dataSnapshot.getValue(Image.class);

                // get the image user
                database.child("users/" + image.userId).addListenerForSingleValueEvent(new ValueEventListener() {
                    @Override
                    public void onDataChange(DataSnapshot dataSnapshot) {
                        User user = dataSnapshot.getValue(User.class);
                        image.user = user;
                        mAdapter.notifyDataSetChanged();
                    }

                    @Override
                    public void onCancelled(DatabaseError databaseError) {

                    }
                });

                mAdapter.addImage(image);
            }

            @Override
            public void onChildChanged(DataSnapshot dataSnapshot, String s) {

            }

            @Override
            public void onChildRemoved(DataSnapshot dataSnapshot) {

            }

            @Override
            public void onChildMoved(DataSnapshot dataSnapshot, String s) {

            }

            @Override
            public void onCancelled(DatabaseError databaseError) {

            }
        });
    }

    // ...
}
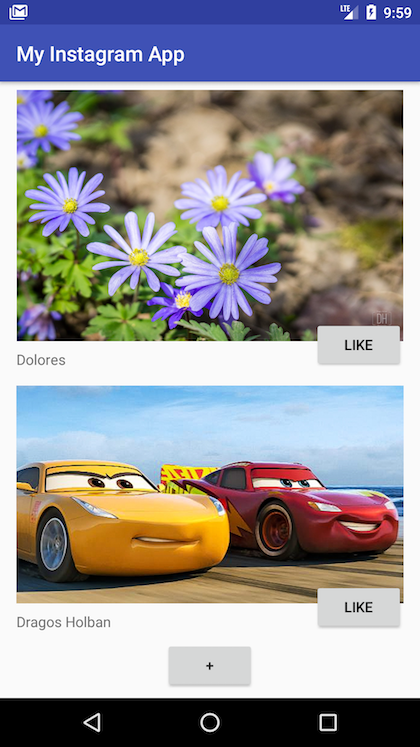
Run the app again and notice how the latest images are displayed in the feed. You can even use another device to upload new images and see how the feed is updated in realtime, no refresh needed. That’s something not even the original Instagram app has!
Implementing the Like Functionality
What would be Instagram (or any other social app) without the “like” button? We definitely have to let the user express their appreciation for the images they see, so let’s implement the “like” functionality in our app too. You noticed that we already added the Like button and the Like model class, so all we need is to make it work.
First, we’ll add the code to save new likes to the database, in the FeedActivity class:
public void setLiked(Image image) {
    if(!image.hasLiked) {
        // add new Like
        image.hasLiked = true;
        Like like = new Like(image.key, fbUser.getUid());
        String key = database.child("likes").push().getKey();
        database.child("likes").child(key).setValue(like);
        image.userLike = key;
    } else {
        // remove Like
        image.hasLiked = false;
        if (image.userLike != null) {
            database.child("likes").child(image.userLike).removeValue();
        }
    }
}
This method will be called each time the user clicks on the Like button. We’ll add a listener for this in our ImageAdapter:
// Replace the contents of a view (invoked by the layout manager)
@Override
public void onBindViewHolder(ViewHolder holder, final int position) {
    final Image image = mDataset.get(position);
    if (image.user != null) {
        holder.mTextView.setText(image.user.displayName);
    }
    Picasso.get().load(image.downloadUrl).into(holder.mImageView);

    holder.mLikeButton.setText("Like (" + image.likes + ")");
    if(image.hasLiked) {
        holder.mLikeButton.setBackgroundColor(mActivity.getResources().getColor(R.color.colorAccent));
    } else {
        holder.mLikeButton.setBackgroundColor(mActivity.getResources().getColor(R.color.colorPrimary));
    }
    holder.mLikeButton.setOnClickListener(new View.OnClickListener() {
        @Override
        public void onClick(View v) {
            mActivity.setLiked(image);
        }
    });
}
The last thing to do is to load the likes every time we receive a new image from the Firebase database:
// Get the latest 100 images
Query imagesQuery = database.child("images").orderByKey().limitToFirst(100);
imagesQuery.addChildEventListener(new ChildEventListener() {
    @Override
    public void onChildAdded(DataSnapshot dataSnapshot, String s) {

        // A new image has been added, add it to the displayed list
        final Image image = dataSnapshot.getValue(Image.class);

        // get the image user
        // ...

        // get image likes
        Query likesQuery = database.child("likes").orderByChild("imageId").equalTo(image.key);
        likesQuery.addChildEventListener(new ChildEventListener() {
            @Override
            public void onChildAdded(DataSnapshot dataSnapshot, String s) {
                Like like = dataSnapshot.getValue(Like.class);
                image.addLike();
                if(like.userId.equals(fbUser.getUid())) {
                    image.hasLiked = true;
                    image.userLike = dataSnapshot.getKey();
                }
                mAdapter.notifyDataSetChanged();
            }

            @Override
            public void onChildChanged(DataSnapshot dataSnapshot, String s) {

            }

            @Override
            public void onChildRemoved(DataSnapshot dataSnapshot) {
                Like like = dataSnapshot.getValue(Like.class);
                image.removeLike();
                if(like.userId.equals(fbUser.getUid())) {
                    image.hasLiked = false;
                    image.userLike = null;
                }
                mAdapter.notifyDataSetChanged();
            }

            @Override
            public void onChildMoved(DataSnapshot dataSnapshot, String s) {

            }

            @Override
            public void onCancelled(DatabaseError databaseError) {

            }
        });

        mAdapter.addImage(image);
    }

    // ...
});
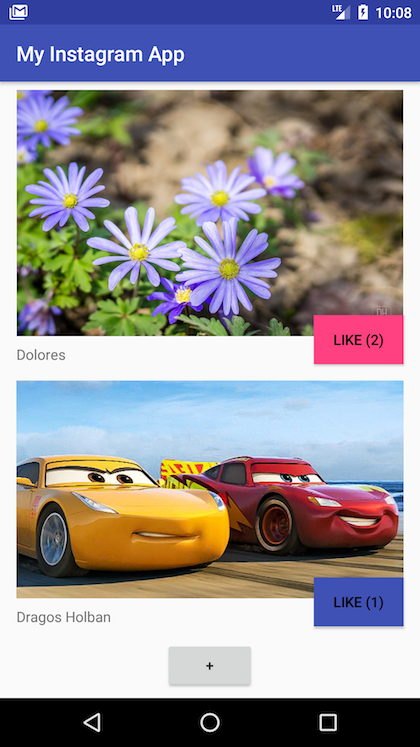
Run the app on two or more devices, sign in with different users, upload some images and start clicking on that Like button! You will see everything updating in realtime, on all the devices. How cool is that?
Sending Push Notifications Using Firebase Functions
The last thing we’ll do for our Instagram-like app, is to send a push notification whenever somebody “likes” an image, to the user that posted that awesome image. We’ll use the Firebase Functions service that allows you to write and run code in the cloud, without having to manage or worry about any backend server at all.
Go to the Firebase Console one more time and click on the Get Started button from the Functions section. Follow the instructions to get you started. We’ll use Javascript to write our code that will watch the database for new likes and send a push notification every time a new like is created.
In the created Firebase project, open the functions/index.js file and add the following code to it:
const functions = require('firebase-functions');
const admin = require('firebase-admin');

admin.initializeApp();

// Listens for new likes added to /likes/:pushId and sends a push notification
exports.sendLikeNotification = functions.database.ref('/likes/{pushId}')
    .onCreate((snapshot, context) => {
        // Grab the current value of what was written to the Realtime Database.
        const like = snapshot.val();

        // Get the image liked
        admin.database().ref(`/images/${like.imageId}`).once("value", (snapshot) => {
            const image = snapshot.val();

            // get the user that liked the image
            const getUserLikedPromise = admin.database().ref(`/users/${like.userId}`).once('value');
            // get the user that posted the image
            const getUserImagePromise = admin.database().ref(`/users/${image.userId}`).once('value');

            return Promise.all([getUserLikedPromise, getUserImagePromise]).then(results => {
                const userLiked = results[0].val();
                const userImage = results[1].val();

                if (userLiked.uid === userImage.uid) {
                    return console.log("User liked his own image.");
                }

                if (userImage.token) {
                    // Notification details.
                    const payload = {
                        notification: {
                            title: 'You have a new like!',
                            body: `${userLiked.displayName} liked your image.`
                        }
                    };

                    console.log("Will send notification to user: " + userImage.uid);

                    return admin.messaging().sendToDevice(userImage.token, payload);
                }

                return console.log("No device token for user: " + user.uid);
            });
        }, (errorObject) => {
            return console.log("The read failed: " + errorObject.code);
        });
    });
Now deploy the code using the firebase deploy command (run this twice if it gives you an unexpected error the first time).
Back to our Android project, we need to make a few more changes so the device token will be updated to the Firebase database every time it changes.
To be able to receive push notifications, we need to add the FCM dependency to the app’s build.gradle file:
dependencies {
    // ...
    implementation 'com.google.firebase:firebase-core:15.0.0'
    implementation 'com.firebaseui:firebase-ui-auth:3.3.1'
    implementation 'com.google.firebase:firebase-storage:15.0.0'
    implementation 'com.google.firebase:firebase-database:15.0.0'
    implementation 'com.squareup.picasso:picasso:2.71828'
    implementation 'com.google.firebase:firebase-messaging:15.0.2'
}
In the AndroidManifest.xml file, add the following service:
<?xml version="1.0" encoding="utf-8"?>
<manifest...>

    <uses-permission android:name="android.permission.READ_EXTERNAL_STORAGE" />

    <application
        ...>
        ...
        <service
            android:name=".MyFirebaseInstanceIDService">
            <intent-filter>
                <action android:name="com.google.firebase.INSTANCE_ID_EVENT"/>
            </intent-filter>
        </service>
    </application>

</manifest>
Now, create a new Java class named MyFirebaseInstanceIDService with the following contents:
public class MyFirebaseInstanceIDService extends FirebaseInstanceIdService {

    /**
     * Called if InstanceID token is updated. This may occur if the security of
     * the previous token had been compromised. Note that this is called when the InstanceID token
     * is initially generated so this is where you would retrieve the token.
     */
    // [START refresh_token]
    @Override
    public void onTokenRefresh() {
        // Get updated InstanceID token.
        String refreshedToken = FirebaseInstanceId.getInstance().getToken();

        // If you want to send messages to this application instance or
        // manage this apps subscriptions on the server side, send the
        // Instance ID token to your app server.
        sendRegistrationToServer(refreshedToken);
    }
    // [END refresh_token]

    /**
     * Persist token to third-party servers.
     *
     * Modify this method to associate the user's FCM InstanceID token with any server-side account
     * maintained by your application.
     *
     * @param token The new token.
     */
    private void sendRegistrationToServer(String token) {
        FirebaseUser firebaseUser = FirebaseAuth.getInstance().getCurrentUser();
        if (firebaseUser != null) {
            User user = new User(firebaseUser.getUid(), firebaseUser.getDisplayName(), token);
            DatabaseReference database = FirebaseDatabase.getInstance().getReference();
            database.child("users").child(user.uid).setValue(user);
        }
    }
}
This will update the token when needed so we have the latest information in our database and be able to send push notifications.
Now start using the app again. Users will start to receive push notifications when somebody “likes” one of their uploaded images.

That’s it! We now have a starting point for the next Instagram-like app. Of course, there are many things that can be, and should be, done to have a fully featured app, but now you should be able to add as many features as you want. Please let me know in the comments what else you added and leave a link to your published app if you have one.
I hope you enjoyed building this and learned a lot along the way. Please let me know in the comments how it was for you, if you found any problems or if you have any improvements to suggest. Also, if this tutorial helped you build some other Android apps, please add some links in the comments and tell all of us about them.
You can get the final code from GitHub, in case something goes terribly wrong and you don’t manage to fix it. See you at the next Android tutorial!
Brilliant… Just what i needed … A way of adding the bottom navigation to activities … would be a greate way to suppliment ( helping a long way) on this tutorial.
thanks for the great guide that you have here.
wonder if i can make the activity_feed only display current user or selected user’s images only.
hey i noticed the pics are gone when you scroll. how do you make it stay in place after they’re loaded?
found the problem. it’s because the image from my camera is too big. probably too big for the cache? idk about the technical side of things.
when i add bitmap compression and display the compressed image, they stay in place.
also added another upload task, gallery access, ditched the like function but made a delete button instead etc etc.
gosh, im learning so much from this. thanks man.
Hi, I’m glad you find this useful. If you end up building something, please leave us a link in the comments so we can check it out. Thanks!
Great dude You are awesome !
And i have a question, Since we using Firebase app.. how much it cost for Storage ? (If i publish a real apps)
I mean, is Firebase free storage is enough or what?
Many thanks to you of you answer this
Hi Arif! You can find the pricing for Firebase here: https://firebase.google.com/pricing/
ok thanks ^^
Wheres the code of execution of uploadButton(Button) id to upload images?
Hi Dragos, this is an excellent project, very well explained and easy to follow. Thank you!!
A few things has changed: FirebaseInstanceId.getInstance().getToken() and taskSnapshot.getDownloadUrl() have been deprecated.
The User class exists already inside the FireBase library and gave me an error. I replaced the class with another name (DBUser) and worked perfectly.
Thank you!
Hello Jorge! Thanks for the update, you are very kind!
Hi Dragos, Thank you so much for this excellent program. I have a question though, I do not see my notification on my device, although in Firebase, it says it sent the notification for user id. My device notification is set to on. Any thoughts please?
Trino
Hi please I hope you won’t mind updating this tutorial.it seems like firebase changed the way images are supposed
to be downloaded .Try to have a look at this method getDownloadUrl() no longer works. I need some help please your help will be appreciated.
(Please have a look at the bellow codes)
UploadTask uploadTask = fileRef.putFile(uri);
uploadTask.addOnFailureListener(new OnFailureListener() {
@Override
public void onFailure(@NonNull Exception exception) {
// Handle unsuccessful uploads
Toast.makeText(FeedActivity.this, “Upload failed!\n” + exception.getMessage(), Toast.LENGTH_LONG).show();
}
}).addOnSuccessListener(new OnSuccessListener() {
@Override
public void onSuccess(UploadTask.TaskSnapshot taskSnapshot) {
Uri downloadUrl = taskSnapshot.getDownloadUrl();//The line is not working////////////////////////////////////////////
Toast.makeText(FeedActivity.this, “Upload finished!”, Toast.LENGTH_SHORT).show();
// save image to database
String key = database.child(“images”).push().getKey();
assert downloadUrl != null;
Image image = new Image(key, fbUser.getUid(), downloadUrl.toString());
database.child(“images”).child(key).setValue(image);
}
});
Thank you.